Before we get to the Orc Town GT 2023 recap, I need to blast through the two prep games I played for the event. Orc Town that year was a staggering 2665 points played on a (not) nice 69 minute clock – you’ll note that we are not playing on clocks in these two games, but you should consider this foreshadowing for the event itself. Chekhov’s smoking chess clock, if you will.
Anyway, I played some bloated games of Kings with my buds. Brace for recap!
A surprising amount changed for The Hallow between Pilgrimage and Orc Town. My Tribal bros all got spears (and would never put them down again, especially after Clash 2024), but the horde lost sharpness … because why be a hammer when there’s a third horde of Brutes to do that work? I also used the extra points to get my derpy Hydra on the table, and toss a Warden into the mix for chaff work. I love the current Clash changes to them, but even without inspiring I’ve seen potential in the weird little guy. Plus it gave me an excuse to paint up a larger mushroom dude to pal around with my myconid Great Chieftain.
Finally, take a shot every time my Lycan Alpha uses her Wingbane Cloak 😅 I totally should have kept the Lycans at brew of strength and used the 5 points to give the Alpha her hex back but I guess I wanted her to be extra annoying to the flyers she seems to always be fighting.
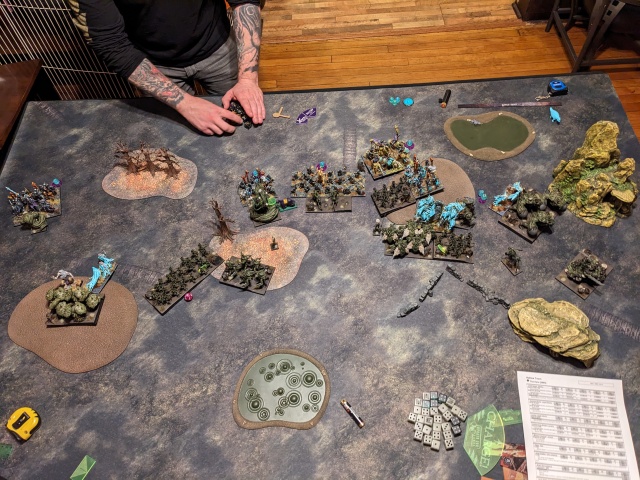
NATURE 2665 Air Elemental Horde – Probably Hammer Earth Elemental Horde Earth Elemental Horde Scorchwings Horde Scorchwings Horde Scorchwings Horde Water Elemental Regiment Water Elemental Regiment Woodland Critters Regiment Greater Air Elemental Greater Water Elemental Tree Herder – Surge (8) Gladewalker Druid – Ring of Harmony, Surge (8), Etc. Druid on Steed – Surge (4), Bane Chant (2), Etc. Unicorn – Cool Spells 15(26)
Jason ran Forces of Nature at both Dead of Winter and Pilgrimage and did surprisingly well – remember that this was 2023, so the flying elemental shitshow list was de rigueur for the meta – and figured he’d lean harder into the Scorchwing angle with the extra points. Note that this list doesn’t have enough unlocks as played, which I can’t figure out. If the Unicorn were a Pegasus this would all be good, so maybe that was the plan? But clearly that kelpie is on a cav base still. Weird.
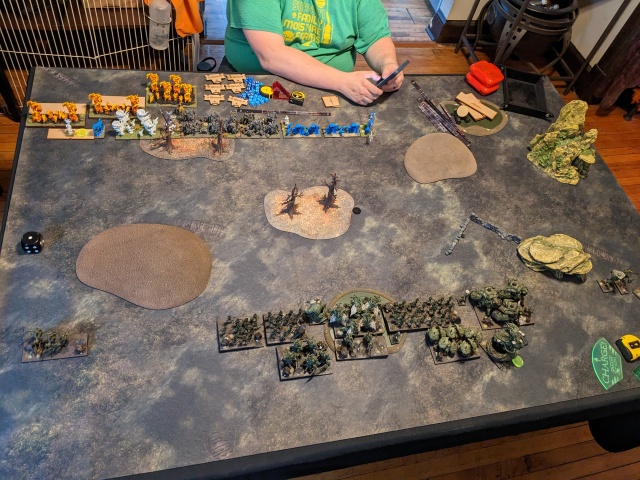
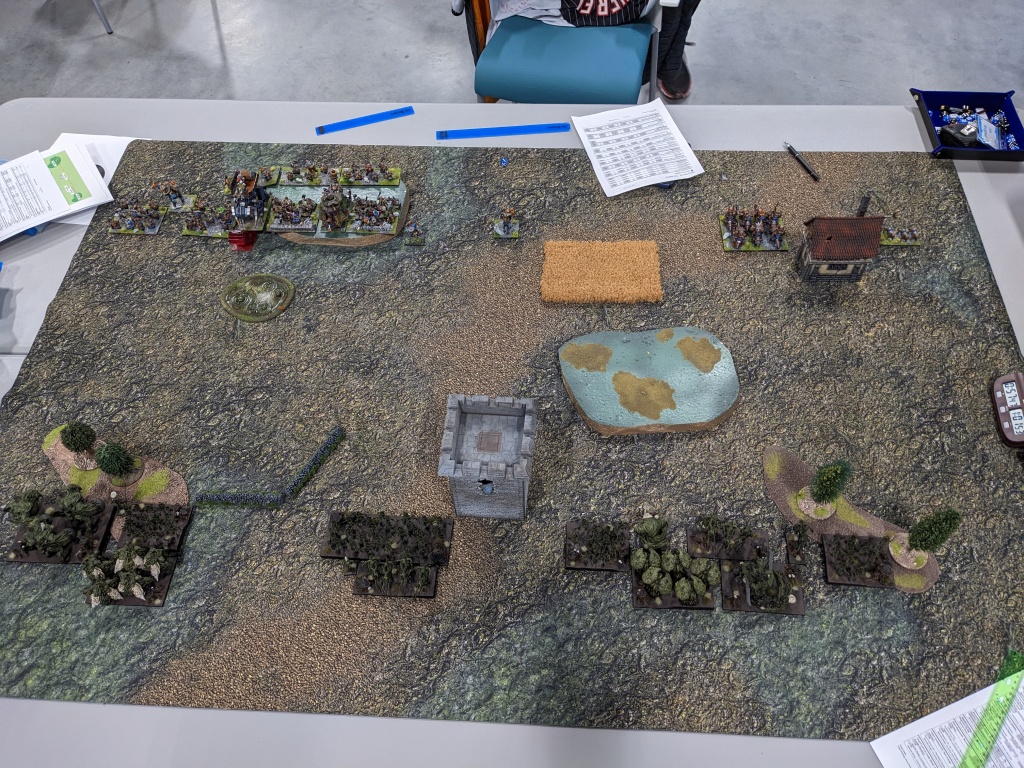
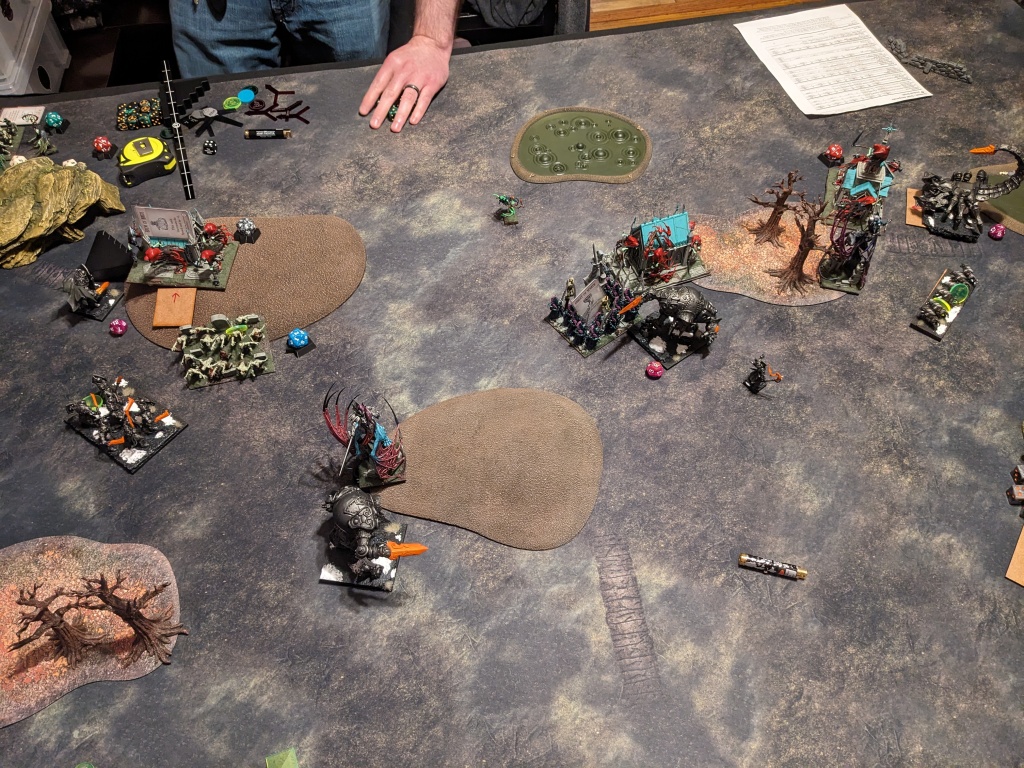
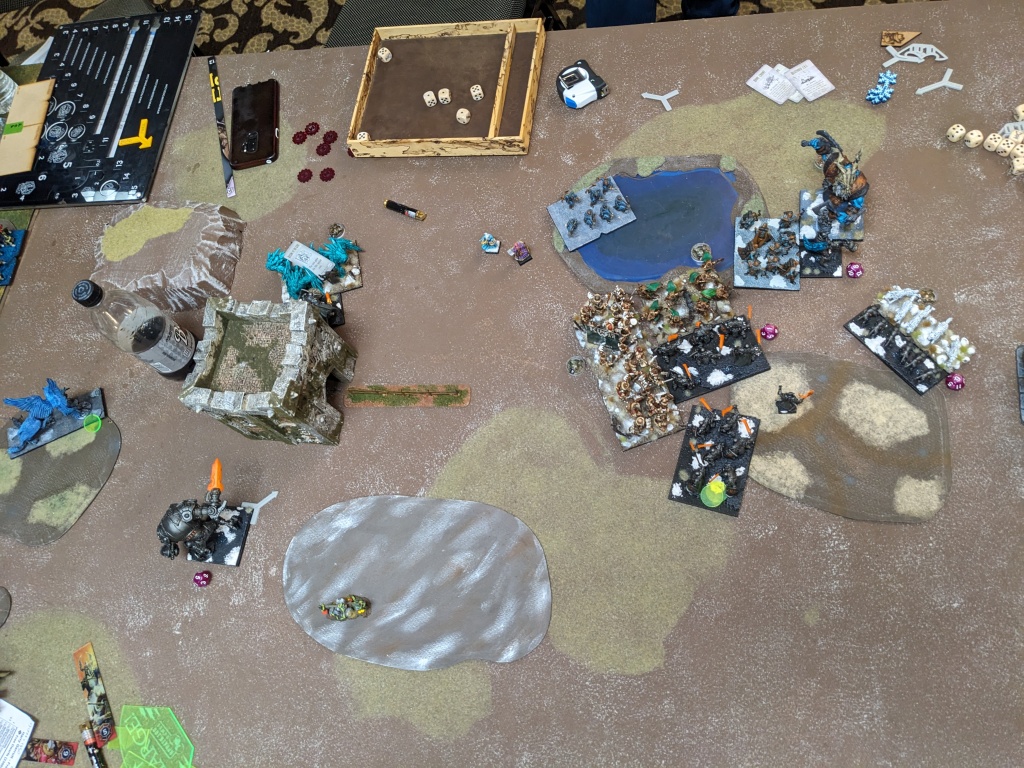
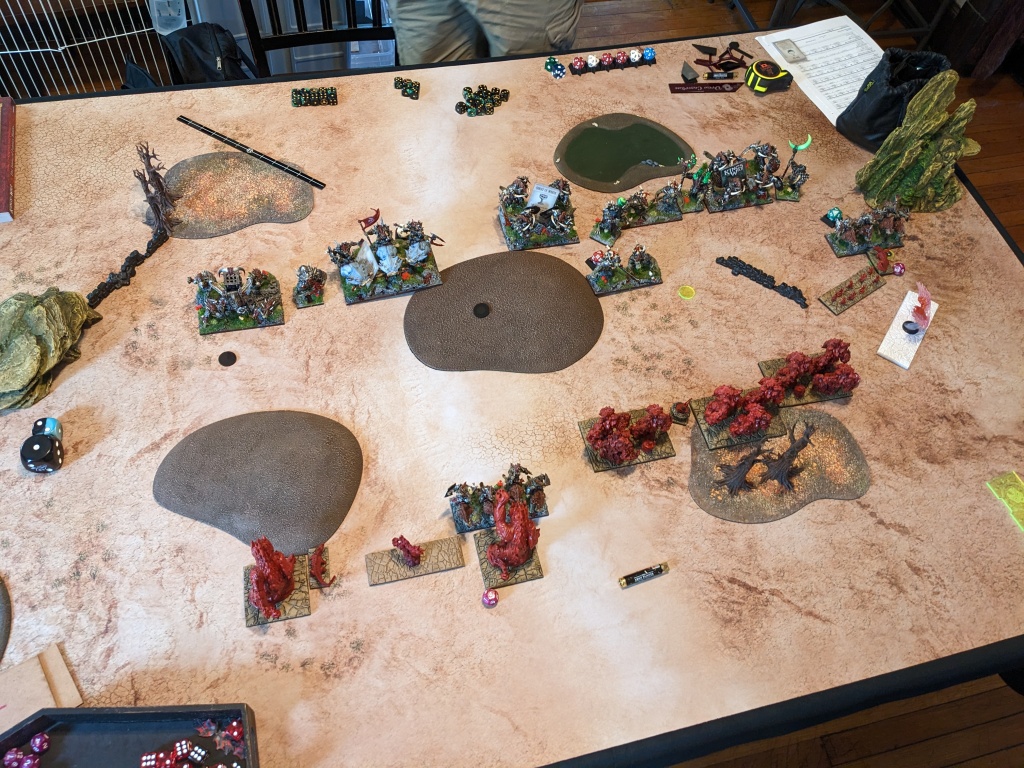
We rolled up Push, and since it’s the old rules for Push, Jason put all his tokens on the Critters on the left, surrounded by Scorchwings, and I stacked mine on the Hydra because that’s literally his only job. I went first, one way or another.
BATTLE
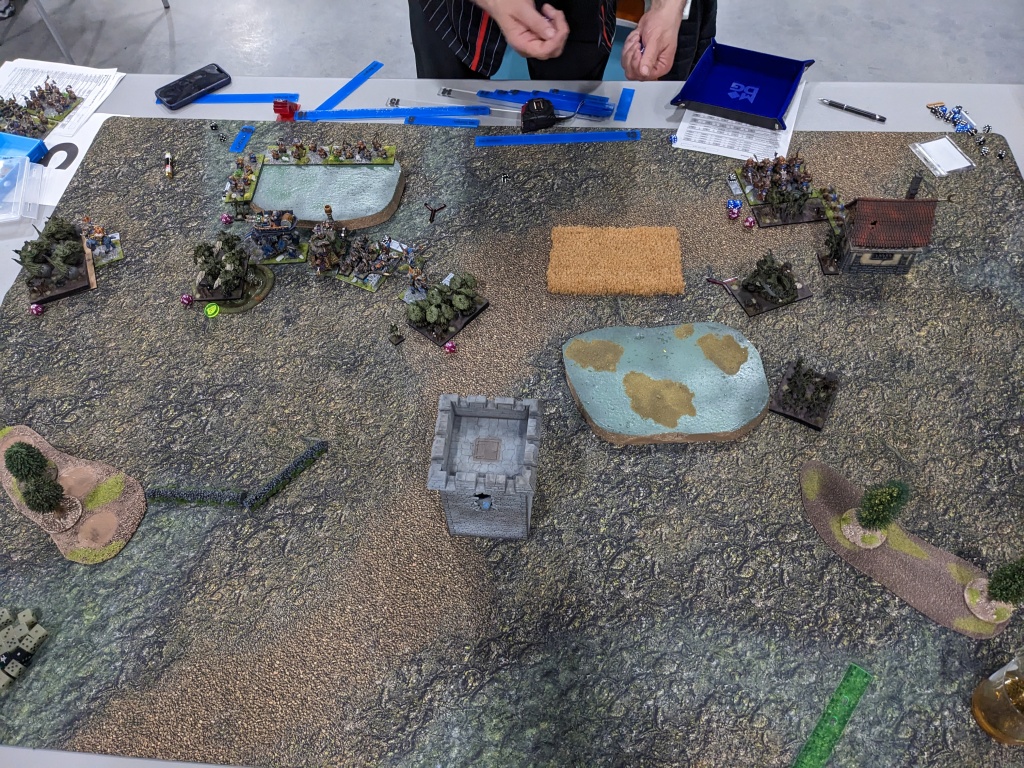
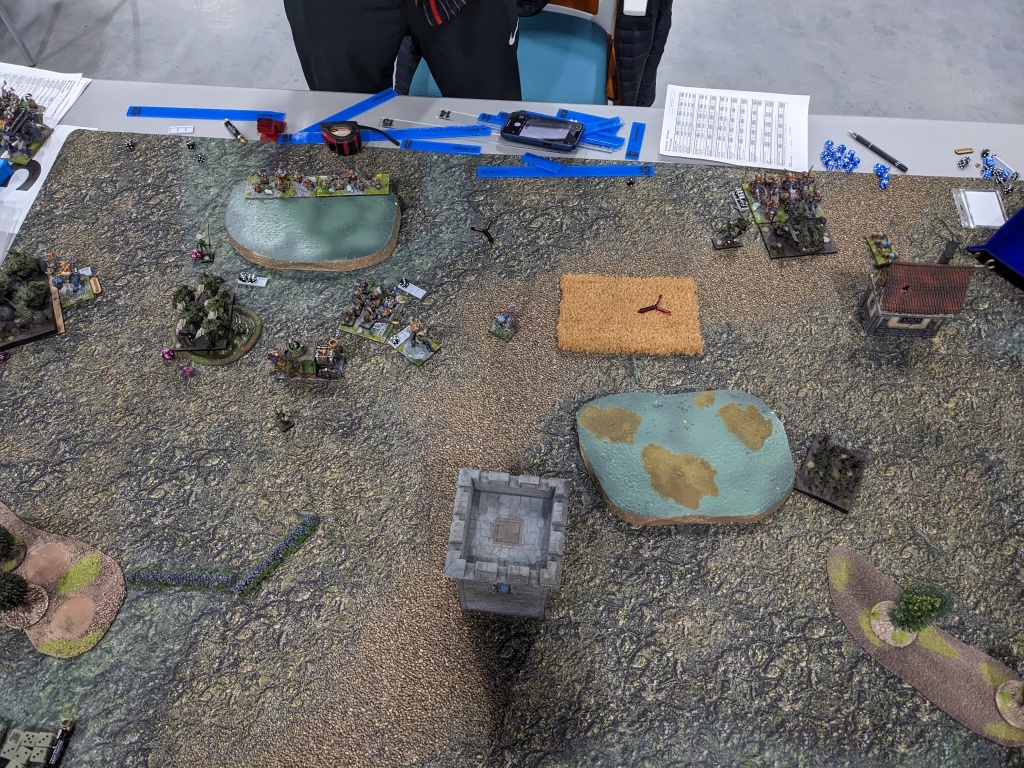
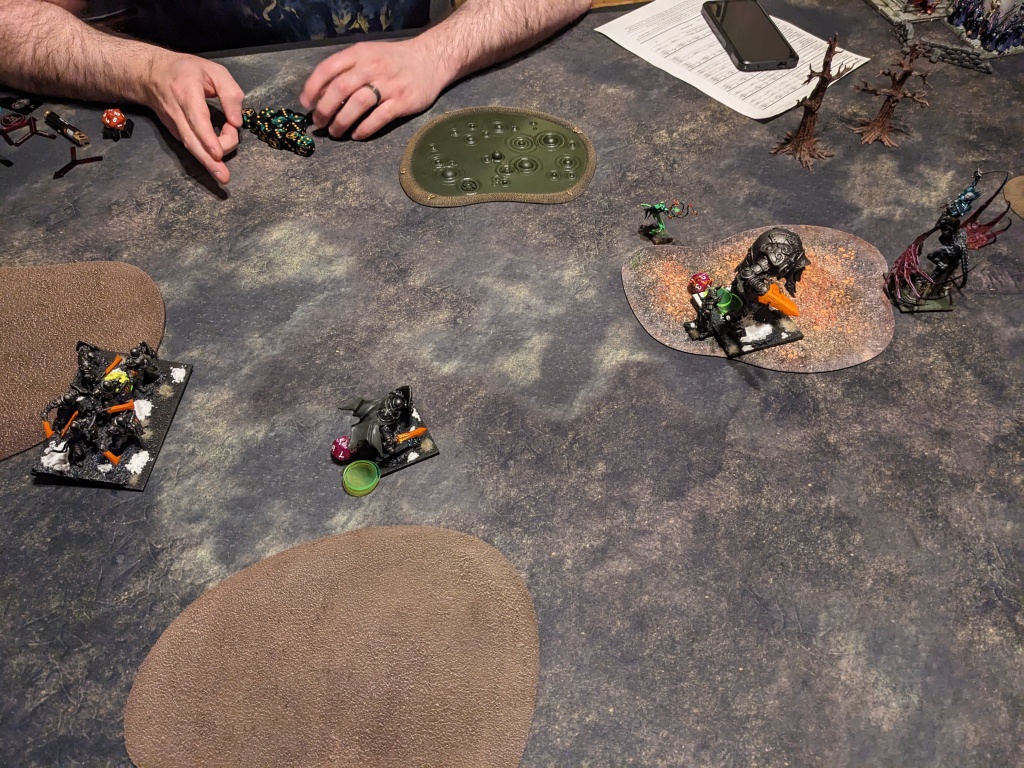
Once his tokens were piled on the Critters dragging themselves down the board edge, escorted by 1000 points of flying hordes, I knew I was just playing for the center token. To that end, I loaded it into the Tribal Spear horde early, which was taken off by a gnarly Air horde flank, then pounded on by the Stampede until my plucky Forest Warden finished off the Air Elementals. The Warden was able to hide behind the Stampede’s big base and weather the storm, winning the game.
A lot of credit for this goes to the Stampede for being a bit of a brickhouse, absorbing frontal charges from Air, Earth and Scorch hordes and a flank from Scorchwings before succumbing. Jason’s extremely weighted flank was an interesting gambit that tripped over itself a little bit – triple Scorch hordes take up a lot of board space – but kept my rampage contained and nabbed some decent kills in the process. I don’t remember his shooting being too crippling but it certainly took a toll on my chaff.
HALLOW VICTORY
It’s interesting looking back on this game from the future, where Nature has been gently nerfed. The list (once you swap Unicorn for Pegasus and make it legal) is still fine? But the GAE is weaker and the Scorchwings cost more what they should. Basically it’s the same, but with fewer spells / items to add polish. More importantly, Push has been blessedly modified since this game happened, so what we did with our token carriers is legal but far less lucrative. Obviously to the detriment of flying nimble elite Nature more than Herd, tho I have felt the squeeze as my stuff is so often dead come late game.
A final note, Jason actually ended up speed painting a Morax spam army in time for Orc Town! He did quite well, and would do so again at King Beyond the Wall. Mad props. His Nature, like most Nature armies from 2023, has largely fallen by the wayside. RIP.
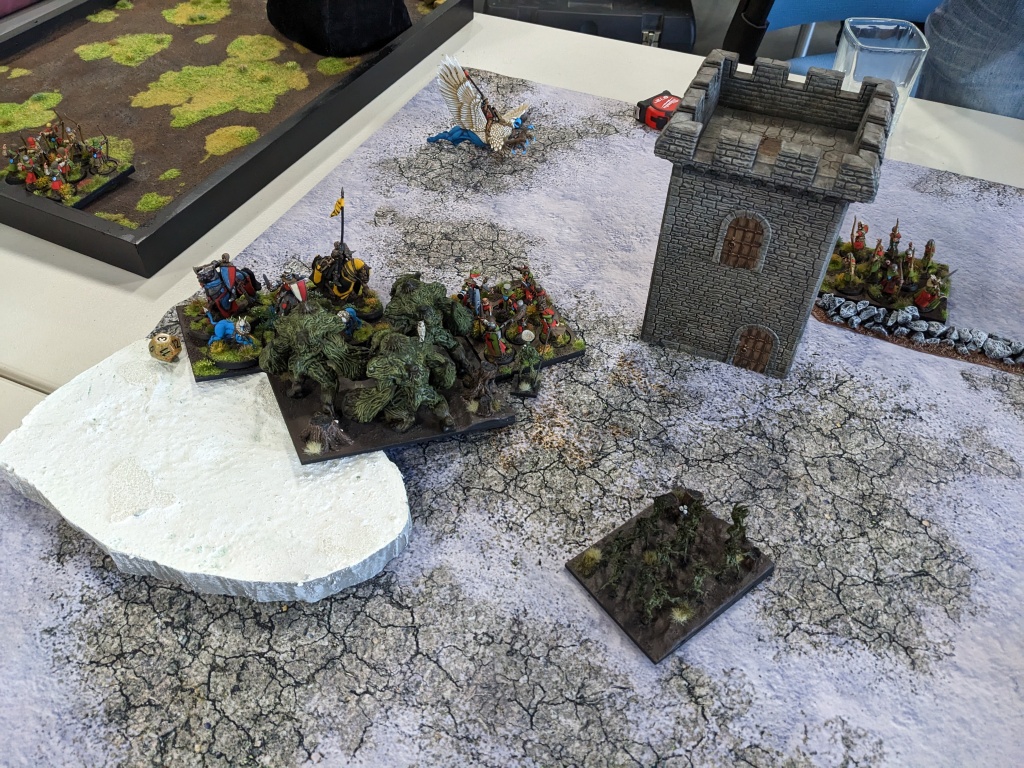
Summer 2023 was peak Wraiths for Jeff. He had figured out how to use them, and all he wanted to do was use more and more of them. I had convinced him to try out a regiment instead of just six (!) troops of ghosts, but as much as I insisted he give them sharpness so they could do something in combat, I’m pretty sure he continued to resist and put sharpness on an SRC reg instead. Talk about putting a hat on a hat, m’right? I’ve guessed on the rest of the list but it features plenty of classic Jeff Undead-isms. The triple Lykanis is a cool thing that I really don’t think he took to Orc Town, or ever ran again for that matter. Which is too bad, I think it has potential, even if it requires more work / clock to get the most from.
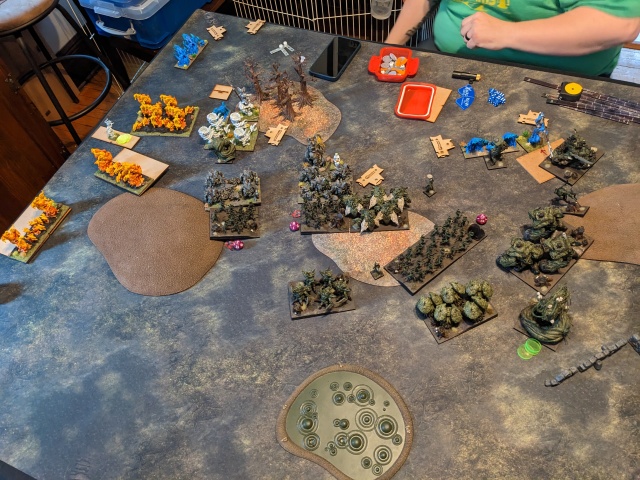
We rolled up Loot, taking a break from the Plundering that Jeff and I are usually up to. I scouted my Warden up and went first, possibly because Jeff made me.
BATTLE
Jeff and I play a lot, as you’re well aware, so I think it’s telling that the units that made the most difference here were the new things he had added. The Wraith regiment held me up forever, which let his vamp hammers on the right sort through my blockers and smash into my hammers once they were free. Only my Lycans, as the second wave hammer, survived out of all the units on that flank! On the left, he aggroed my Brutes with two Lykanis and a Wraith troop, which unexpectedly killed my horde in two turns (at the cost of one Lykanis). I had to divert my Tribal horde (loot in hand) over to deal with the SRC over there, except without sharpness it wasn’t to be and that flank collapsed.
In the center, my Hydra scooped a loot then plowed into some Soul Reaver Infantry. Big guy should hold a turn, right? Probably have a bitching counter assault thanks to all the damage? Math said yes, Jeff’s dice said no! Hydra bit it and I had a problem … which I applied Brutes to. Unfortunately his Revenant horde, always utter chads, started eating my Brute hordes and didn’t stop until it got Lycan’d in the end game. With two of the tokens, things were still rosy for me except that the damn left flank Lykanis pounced on the last of my Tribal Spear regs and tore them apart over two turns, grabbing my token and giving Jeff that rare W against me.
HALLOW LOSS
Credit to Jeff, he had some strong plays (that he thought were dumb, like yeeting the Lykanis into the Brutes) that combined with his trademark Great Vampire Dice and Wraith’s insane value worked out once the swirling chaos of melee had ended. I’m quite sure he didn’t actually take all these wolf heroes to Orc Town, instead taking 2x Wraith regs + 4x Wraith troops, which to date is maximum ghost for him.
As the tournament was being held offsite from the hotel, shenanigans were kept to a dull roar after day one wrapped and we collectively feasted. All too soon, it was time to rejoin the battle for the Mid-Atlantic. Having gone 1-2, my Herd were drifting down the standings, but I was gunning for that day two rally to shore my record up.
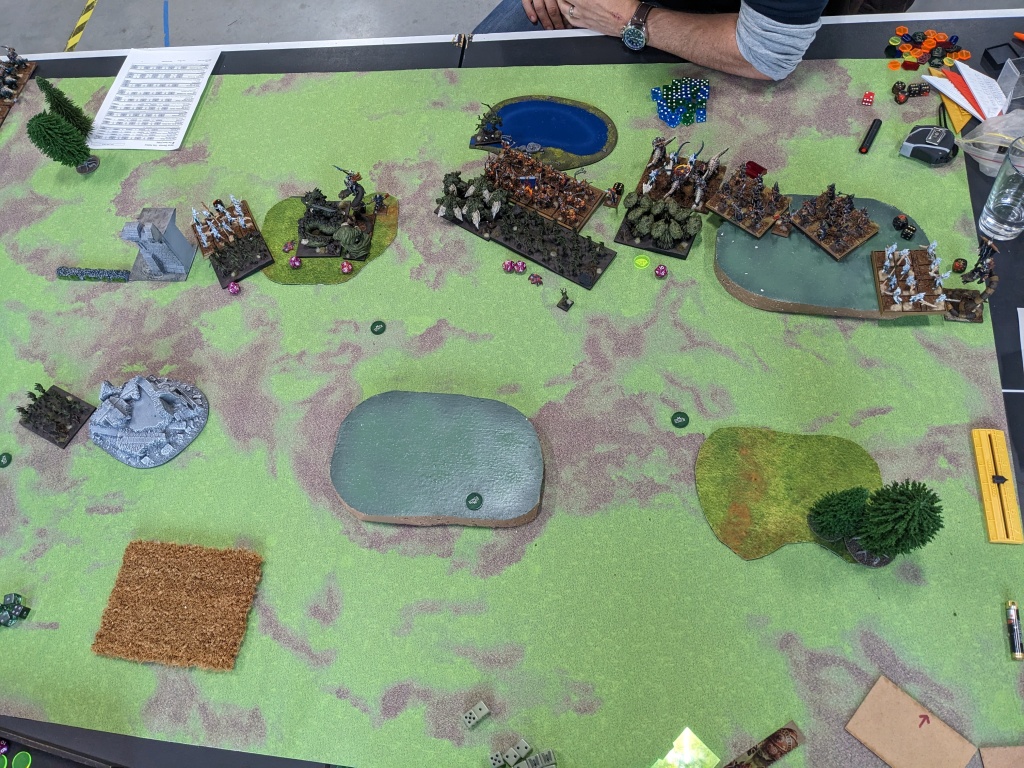
I almost never face Goblins, so that’s cool, but these gobs are being piloted by Steve Forster of Dash28 fame! I do enjoy throwing down with people I recognize from the Internet. Steve’s list seemed fine, free of the really egregious shooting spam I’ve heard about and a little more interested in fighting than being trash (i.e. two Troll hordes and double Slashers). The Slashers were the biggest wild card for me, having been freshly buffed in Clash 2023 and a unit I really like in theory.
We played Salt the Earth I think, except neither of us wanted to burn any so we basically played Pillage 😛 I did not go first this game! But not by choice 😉
BATTLE
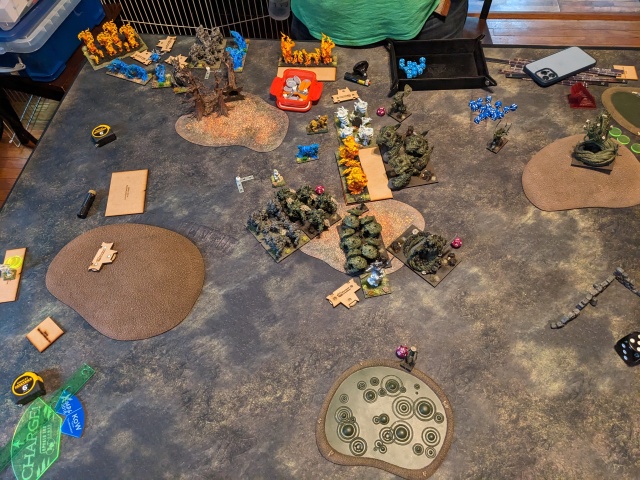
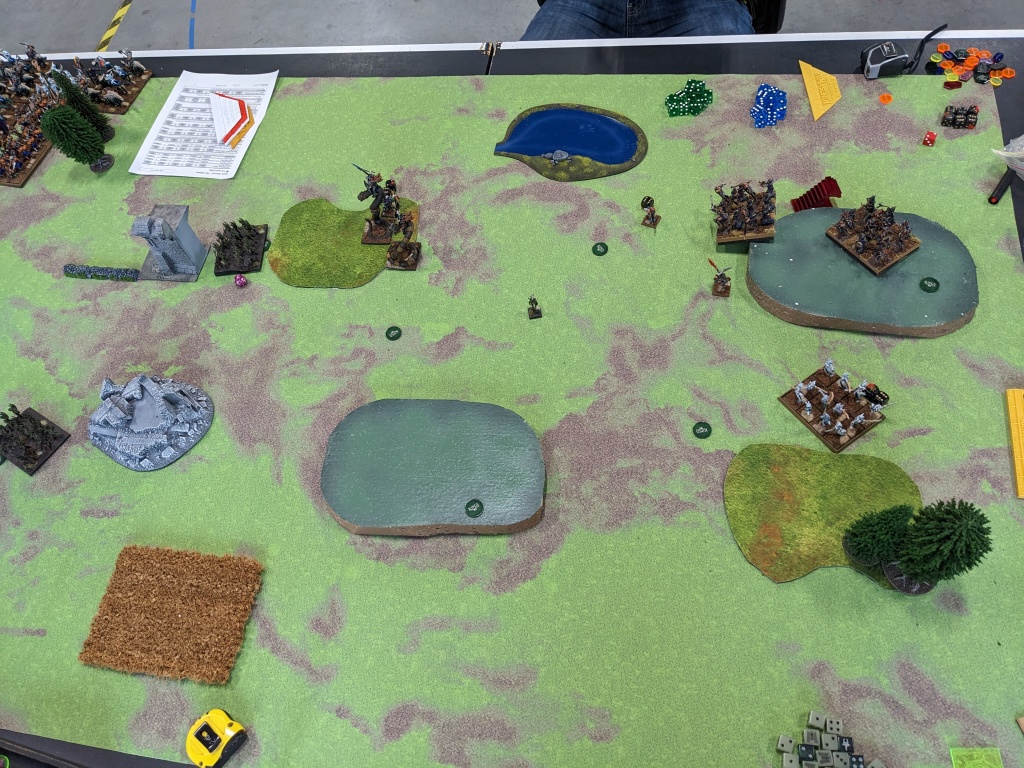
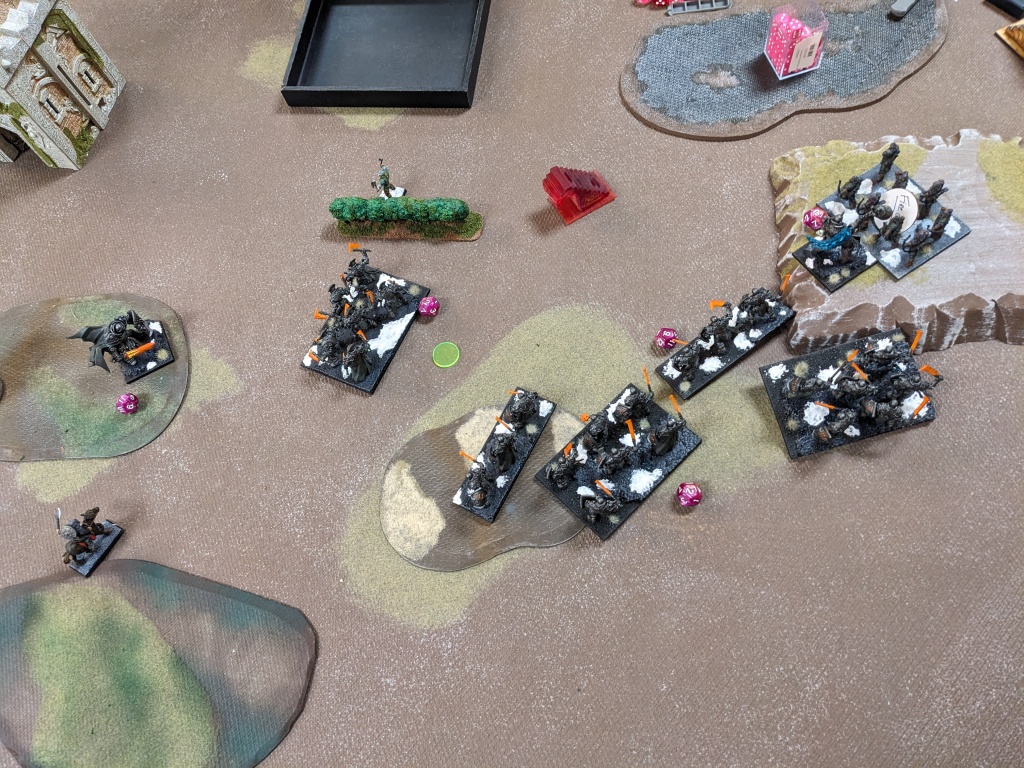
I approached this game like most of my Herd games: junk wanders forward to prepare counters from my slower hammers, while my Lycan super-hammer hunts down a flank and applies pressure, with the Stampede forcing enemy hammers back. Versus Goblins this seems to run into an awkward situation where they too have a bunch of garbage pushing forward or holding objectives, except instead of hammers they mostly have short range guns. The twist here is that Slashers are very very good, IMO, and Steve’s dice were especially kind to them, in combat or when trumpeting.
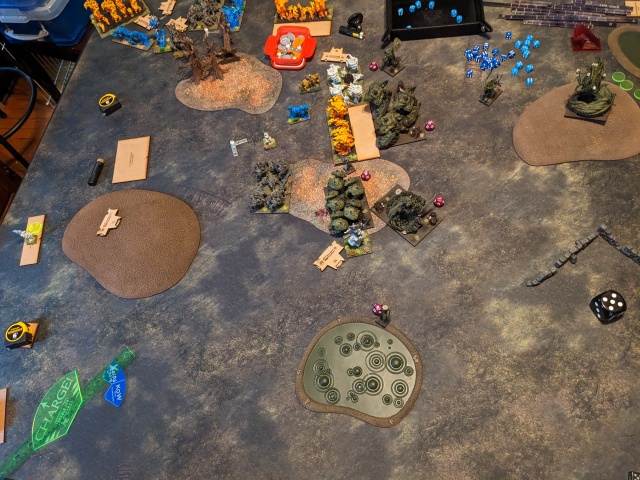
The play of the game for me was spotting a Troll flank with my Lycans at almost full charge, which they nimbled into and suddenly Steve has a Lycan horde in his rear. I made the choice to reform the Lycans towards Steve’s center, rather than clean up the left entirely, but then was chaffed and lost the big worm’s targets. My other hammers similarly suffered to get much momentum going – I’d kill a thing, get shot, maybe wavered out of combat (I have a lot of fury that does nothing in that case), maybe fight again, but I’m bleeding to death and the Goblins don’t care. Come end game, I once again have very little left to score, while the Goblins have more than enough to take it.
HALLOW LOSS (4-9)
I don’t know how Steve got 9 points? It definitely doesn’t look like a draw in those last photos! All the same, well played by Steve and I seriously underestimated the Slashers throughout, and paid the price.
GAME 5: LEAGUE OF RHORDIA
Honour Guard Horde Honour Guard Horde Foot Guard Horde (or Dogs of War?) Knights Regiment Knights Regiment Pole-Arms Regiment Pole-Arms Regiment Halfling Archers Regiment Halfling Archers Regiment Battle Shrine [1] Duke on Ancient Winged Aralez Duke Hetronburg [1] Duke on Horse Baron 14(29)
I don’t have John’s list but this is my best recreation. There are 90 points of upgrades missing, which feels right between all the Indomitable Wills and typical upgrades for cavalry or hammers. John was a super nice dude, and a very low key end to the event. If not on the bottom table, we weren’t far from it!
We played Invade to finish the tournament out. The Hallow took the initiative, for a solid four out of five first turns to me. Not bad.
BATTLE
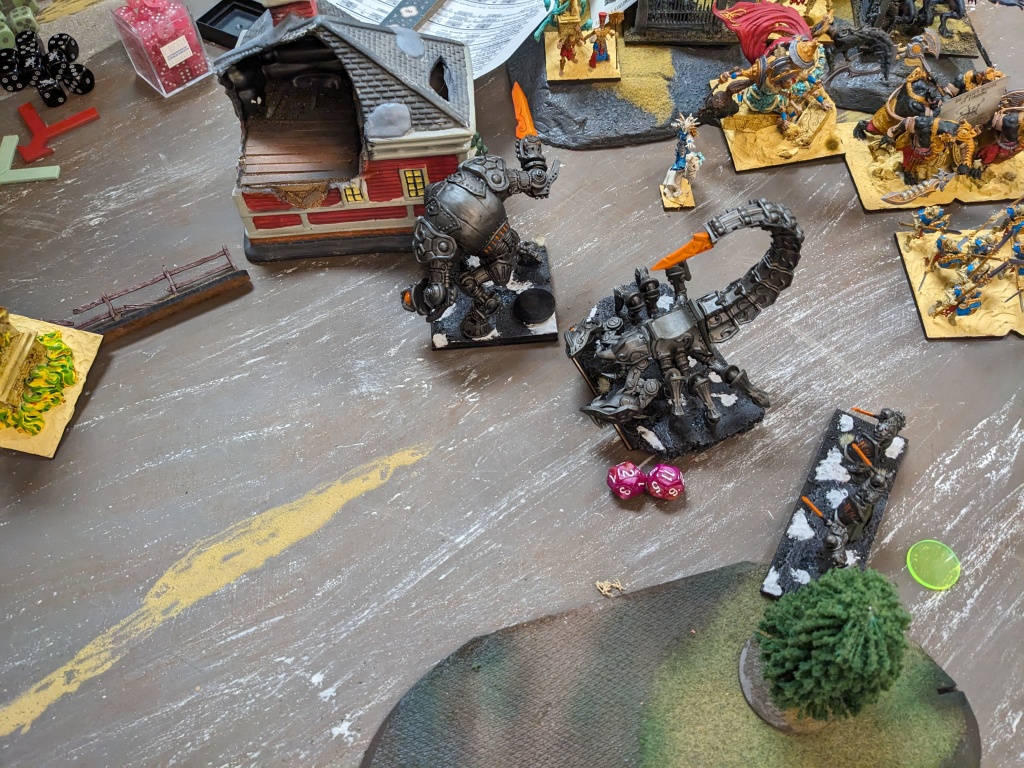
My memory of this game is the weakest of all of them, but I certainly took a lot of photos! Partially because John’s army looked great. The gist of this match is that I woefully undersupported the left flank – the Stampede wasn’t intended to crash through all that fast stuff, but without backup or hot dice it probably wasn’t going to do much, so was essentially delaying the hammers as long as possible … except it’s Invade, so I’m also just letting US3+ walk across the center line and win the game.
On the right, I needed to keep his knights penned in to get my Brutes into play, which only half worked (I wonder if that horde is Dogs of War? To have blunted the Brute charge or clapped back so hard). Plus my Lycans weren’t able to trade for even one knight regiment, a shameful turn of events to be sure. Duke Hetronburg also proved a real thorn in my side, with his Ht 4 hard for my short army to keep in check. In the end, the Brutes and the Lycan Alpha survived, however weren’t enough to offset John’s Honor Guard and couple infantry regiments – all three units that started the game in the upper left! Thanks Stampede 😦
HALLOW LOSS (?-?)
If I had to guess, I’d say I picked up another 3-4 points. Despite getting a trickle of points every game, a single win out of five games wasn’t the best feel to leave with. None of my games felt out of my control, even against Ken, but they all spiraled away in the late game as my soft bodies got bogged down or shot. It was also pretty clear to me that Tribal Spears would have been super helpful in all but possibly the Dwarf game, with so many cav hammers kicking around. Spoilers for the lists ahead.
Sorry for the wait on these Herd reports, and for their brevity. I’ll try to keep the momentum up so we can get back to 2024 🤦♂️
I took my Hallow Herd to four grand tournaments in 2023: Dead of Winter (January), The Pilgrimage (March), Orc Town (June) and King Beyond the Wall (August). You can read about my Dead of Winter run already, but my goal is to finish reports for all of these events before the year ends eventually! Strap in, dead readers, slideshows and recaps are incoming.
The Pilgrimage GT (March 4-5) was five games at 2300 points held in Philadelphia, PA. Of note is that this is a different KOW region from my own, so me and a handful of the Northeastern lads would be raiding the Mid-Atlantic for a change. With decidedly mixed results 😅 It’s worth noting that Pilgrimage used Modified Bullshroud scoring, which gave 10-5-1 points for W-D-L with additions for scenario points and attrition earned, not scenario or attrition differential.
HERD 2300 Lycan Horde – Brew of Strength Guardian Brute Horde Guardian Brute Horde Minotaur Chariot Regiment – The Stampede [1] Tribal Warrior Horde – Brew of Sharpness Tribal Warrior Regiment Tribal Warrior Regiment Tribal Warrior Regiment Centaur Bray Striders Troop Centaur Bray Striders Troop Lycan Alpha – Trickster’s Wand; Hex (2) Great Chieftain – Horn of the Great Migration [1] Centaur Chieftain – Blade of Slashing Druid – Conjurer’s Staff; Bane Chant (2), Heal (2) 14 (27)
In the two months and +150 points between Dead of Winter and The Pilgrimage, all I’ve added is a third regiment of Tribal Warriors and given some tasty upgrades (Wand, Staff, Blade) to the support staff. The concept worked great at DOW, why mess with it? Honestly one of the reasons I went to Pilgrimage was because I wanted to play a 2300 singles event. It sounds weird to say, but those are extremely rare in the Northeast region currently, where we do different points levels or doubles instead.
GAME 1: VARANGUR
The Fallen Horde – Chalice of Wrath The Fallen Horde – Brew of Haste Mounted Sons Regiment – Helm of the Drunken Ram, Guise of the Deceiver Mounted Sons Regiment – Boots of Striding, Guise of the Deceiver Night Raiders Regiment – Bows Snow Foxes Regiment Draugr Regiment Draugr Regiment Magus Conclave – Famulus Magus Conclave – Famulus Frost Giant – Giant Club (!) Magnilde of the Fallen [1] Lord on Frostfang – Snow Fox Skald – Lute of Insatiable Darkness 14(21)
Mike had taken a fairly standard fast Varangur list for this event, with an emphasis on punching as hard as possible but with the usual scenario doers and some shooting of his own. I gave him props for taking a Frost Giant outside of Northern Alliance (with rampage no less!), however he assured me that ‘Frosty the Pillow-Fisted Freakshow’ was mostly a liability. I also took a brief moment to laugh in Herd at his Mounted Sons’ investment in stealth 😅 Note that this is before the Northern Alliance buffs, so the Skald doesn’t grant Ordered March (to the Draugr??) and the Frostlord is still on 9 attaks.
We played Pillage, with the 2 point tokens center and just to the left. The Hallow went first, by design.
BATTLE
The Herd grabbed four of the five tokens immediately and implemented Operation: Bait the Giant All Damn Game on the left. On the right, I used the 19″ charge of the Lycans (1″ longer than Mike’s Sp 9 Fallen, thanks to the Horn of the Great Migration) to force the Fallen to engage, which helped me trade hammers until I had cleared all of the Varangur menace from the board.
HALLOW VICTORY(12-1)
What happens when two hammers smash into each other? The faster hammer with more junk wins, I guess! This was a wild start to the GT and catapulted me to the top table 😐
GAME 2: VARANGUR
Human Clansmen Horde – Norj-Bik (De 5+) Mounted Sons Regiment – Guise of the Deceiver Mounted Sons Regiment – Guise of the Deceiver Mounted Sons Regiment – Guise of the Deceiver Night Raiders Regiment – Bows, Wolf Handlers Night Raiders Regiment – Bows, Wolf Handlers Draugr Regiment Draugr Regiment Lord on Frostfang – Chalice of Wrath, Snow Fox Lord on Frostfang – Staying Stone, Snow Fox Magus – Lightning Bolt (4), Drain Life (6) Magus – Lightning Bolt (4), Drain Life (6) Magus – Lightning Bolt (4), Drain Life (6) Kruufnir [1] 14(24)
So this event had two Australian guests in attendance: Ken Ferris (the then Australian Master) and Jeff Traish (the now Australian Master). After dunking Mike, I had the pleasure of facing Ken Freakin’ Ferris 😵 His Varangur had taken several pages from the elven playbook (recall at the time that Gladestalkers of all flavors had just been buffed, so Night Raiders are doing a pseudo-stalker thing, except with smashier friends), emphasizing shooting with very strong counter-punch and a little sustain thanks to the Magus’ transfusion ability. Again, I took a moment to laugh in Herd at the stealthy knights but let’s be real, it was a nervous laugh.
We played Pillage, with Ken I believe getting the side he wanted. Blessedly, the Hallow got the first turn and took it with gusto, since I had so much shooting to wade through. Note that this game was streamed live – I’m not sure where to or if it’s still around tho, so you’ll have to click thru below per usual.
BATTLE
The first half of the game goes great for me, as I start to roll up Ken’s left flank and remove two of three Mounted Sons regiments early on. I jam hard in the center, preparing to grind in my favor as Brutes pound into the Varangur line. I do have some concern when the Stampede’s early charge into the right Draugr completely flubs, letting a Frostlord start breaking them down, but I’m hopeful that that will hold Ken’s right up until help arrives. All told, the opening three turns have been amazing for me, against the Australian Master of all things!
Then Ken takes a moment to psych himself up – “You’re the fucking Master!” (a direct quote) – and slaps back. His Frostlords heat up and his shooting finally doesn’t have swamp monsters punching them in the face, spelling doom for me. The back half of the game is brutal, seeing my squishy dudes shot off and my harder hitters chased down by Frostlords. I end the game with a single Tribal Warriors regiment cowering on an objective, to Ken’s five.
HALLOW LOSS(3-10)
While it was an honor to play Ken, I will forever remember how close I came to cracking him, on the Internet no less 😤 After the event wrapped, he let me know I was his favorite opponent for taking that rise and fall in stride. What a gent.
GAME 3: DWARFS
Berserker Brock Riders Regiment – Boots of Striding Ironguard Regiment – Throwing Mastiff Ironguard Regiment – Throwing Mastiff Ironguard Regiment – Throwing Mastiff Ironguard Regiment – Throwing Mastiff Sharpshooters Troop Sharpshooters Troop Sharpshooters Troop Mastiff Hunting Pack Regiment Steel Behemoth – Golloch’s Fury [1] Steel Behemoth Dwarf Lord on Large Beast Dwarf Lord on Large Beast Faber Ironheart [1] 14(24)
I played Joe in the first game of his first Kings of War event (Keystone GT 2018), and it’s been great to see him do better and better as time has gone on. He’s been riding pretty high with Dwarfs as their star has risen, with Pilgrimage continuing that trend. His version of The Dwarf List eschewed the formation to go the Ironguard + Sharpshooter spam route, with the double Beast Lords, second Behemoth and Brocks giving it a bit more of a counter-punch feel than some versions. Note that this is pre-Clash 2024, so none of those Dwarfs have Ordered March. Thank the gods.
Pretty sure we played Control, with the Herd going first one way or another. Joe’s a largely reactive player, so he may have let me take it, but either way I was content to race into the Dwarven castle.
BATTLE
My takeaway from this game was that I shouldn’t have given the Dwarfs exactly what they wanted. Joe was clearly going to castle around the hill in the deployment zone he chose; I should have clearly gone hard on the other flank and swept in, forcing him to turn his lines as I scored the back end of the lower left section. Instead, I attempted to ford the gunfire on the left while hooking in from the right. That isn’t horrible … but became much harder when his totally incompetent Brocks couldn’t chew through the Centaurs escorting my Lycan super hammer into his lines, snaking them twice! When my Lycans finally did fight, they flopped hard (5 damage instead of 10 with a 3 to rout), dying for their efforts and leaving the right flank to the Centaur Chief to clean up. Fakk me.
Meanwhile, my assault on the Dwarf castle wasn’t going terribly. I had been pounding through all that De 6+ at a good clip, but Sharpshooters on a hill meant my dudes were not only bleeding from combat but being finished off after those combats wrapped. Come end game, I just didn’t have much left to score, with a lonely Tribal Warrior reg keeping me in unit strength.
HALLOW LOSS (3-10)
I’m not sure why I chose hard mode for this game – I vaguely wanted to give Joe a fun match? As fun as being the gallery part of a shooting gallery is! I kind of wanted to pressure test the Hallow as well, since this was one of my few matches into The Dwarf List, if possibly the first? All the same, Joe’s a good dude and a big fan of mine, and I had had a helluva first day.
UP NEXT: Day 2! Back to the bottom third where I belong.
My clubmate Drew is feverishly working on loads of terrain for our Dead of Winter GT in January, but he’s also playing in it and figured he should probably see if he still remembers of Kings works. I’m always down to smash so had him over one recent Sunday afternoon.
FREE DWARFS Earth Elementals Horde – Brew of Sharpness Earth Elementals Horde Earth Elementals Horde Mastiff Hunting Pack Regiment – Throwing Mastiff Mastiff Hunting Pack Regiment – Throwing Mastiff Mastiff Hunting Pack Regiment – Throwing Mastiff Greater Earth Elemental – Craggoth & Kholearm Greater Earth Elemental Greater Earth Elemental Dwarf Lord on Large Beast – Blade of the Beast Slayer Dwarf Lord on Large Beast – Orb of Towering Presence Free Dwarf Stone Priest – Conjurer’s Staff, Surge (8), Bane Chant (2) 2150 (12/21)
Yea baby, Craggoth is back! I realized I could get my large resin son on the table at 2150, so even if the Stoneclaws are god tier units I couldn’t resist the temptation. Taking so many triples at an event that only allows triples seems kinda spammy but big ol’ shrug there. Also I took throwing mastiffs again because it was that or bloat up the Stone Priest, which I was still hesitant to do.
UNDEAD Wights Horde – Brew of Sharpness Wights Horde – Brew of Haste Wights Horde – Boots of Striding Soul Reaver Infantry Regiment – Chalice of Wrath Zombies Regiment Zombies Regiment Zombies Regiment Wraiths Troop Wraiths Troop Vampire Lord on Undead Pegasus – Surge (4) Vampire Lord on Undead Pegasus Necromancer – Inspiring Talisman; Surge (6), Bane Chant (2) Necromancer – Surge (6), Weakness (2) 2150 (13/22)
Drew hasn’t played his Undead in 18 months and as far as I can tell this is basically the same list as back then. Triple Wights make me endlessly salty (spamming mediocre things is cool, spamming amazing things is boring), but when I spend any time thinking about their drawbacks (i.e. very high points and irregular) I grudgingly can see that they aren’t broken. And Sp 7 puts them on the back foot when it comes to alpha-ing things … except when you’re fighting a Sp 4-6 army 🙃 There are things I’d do differently in this list (trash all the items to upgrade the Zombies to Skeletons or turn the third Zombies into something that does something) but Drew can’t paint anything new so is kind of stuck. And he refuses to play his beautiful Gnollgres any more into the modern meta, because “Ogres suck” 😛 Regardless, this list has 4 units capable of really mangling my metal children, plus the Vampasus nonsense.
We tried out Stockpile this game, one of the new missions from Clash ’24. It’s like Loot but each of the three Loot markers can generate 2-3 tokens each (3 for the center, 2 for the other two). After they’ve been ‘dug up’ or whatever they work the same as normal Loot tokens, as far as carrying them around, etc. goes. Drew won first turn and took it.
BATTLE
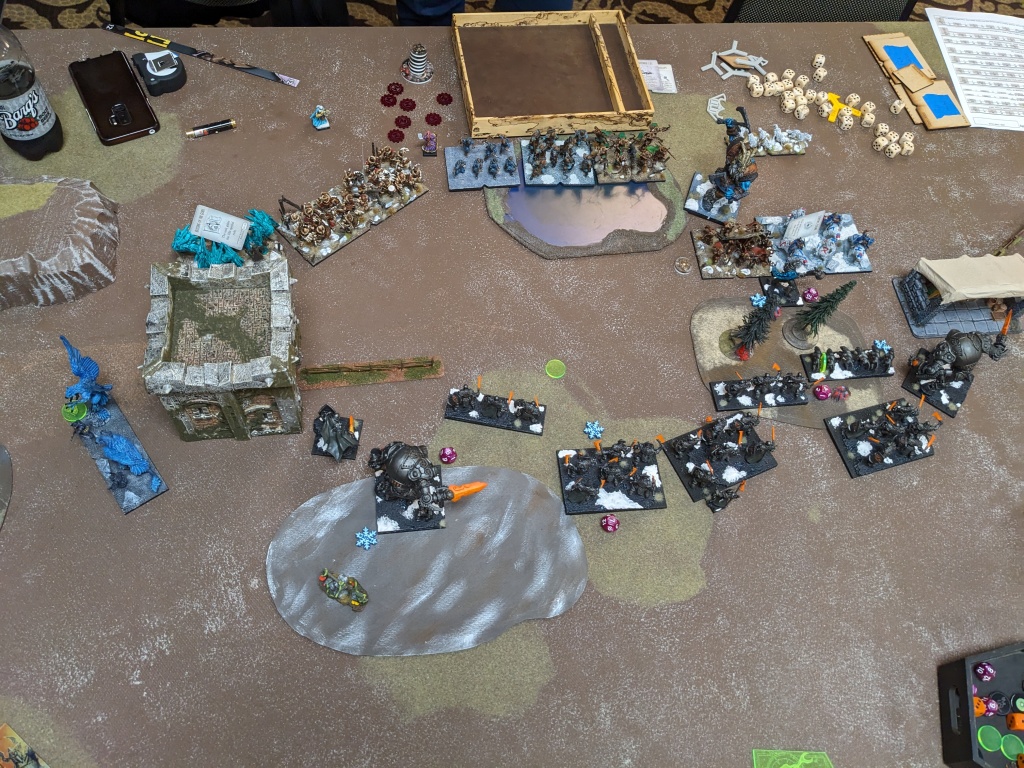
Turn 0: Undead deployment worth noting = the surge Vampasus is on the left, the inspiring bane chant Necromancer is in the center swamp, and the Wights are (left to right) Sp 8, strider, and sharpness. My sharp Earth Elementals are in the center. Craggoth scouts forward directly into the right Vampasus’ face, generally making his life difficult.
Turn 1: The Undead creep forward! After some debate, the right Vampasus abandons the flank, not able to hop past Craggoth. But a Necromander weakens the big robot scorpion for good measure.
The Freeforged stumble forward in response! All three Mastiff Packs scamper up and dig tokens out of the Stockpile markers. I’m essentially doing the dirty work, assuming Drew will smash the dogs and take my tokens, but I’d rather we were fighting over something so may as put some tokens into play.
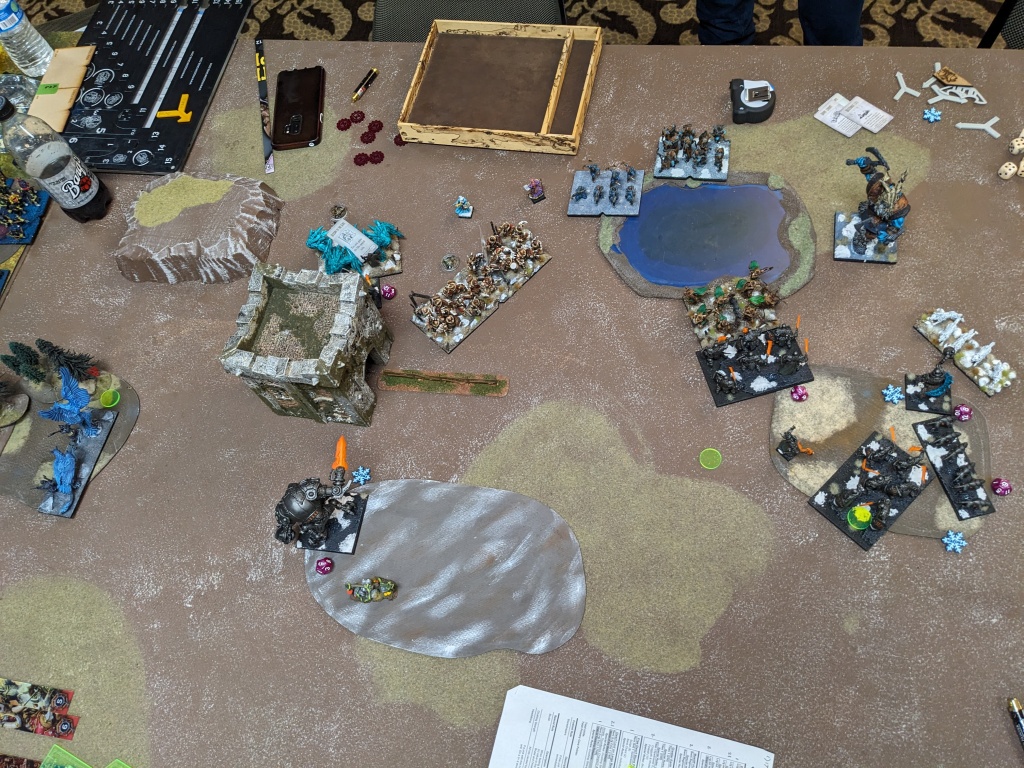
Undead 2: Drew refuses to commit any hammers 😐 Instead it’s a chaff off, with two regiments of Zombies swarming off the hill into Mastiffs on the left (3 damage) and bane chanted Zombies and Wraiths dismembering the pack in the center. Those Zombie units pull more tokens out of the Stockpiles while they’re at it. Also Craggoth is weakened a second time.
Free Dwarfs 2: While they aren’t the trades I want, I figure I might as well go hard and see just how much the premier Undead hammers can lift. Starting on the left, the orb Beast Lord grounds the fast Wights (4 damage), while the Earth Elemental horde on that flank joins up with the Mastiffs to do 6 damage to some Zombies (…). In the center, the sharp Earth Elementals charge off a hill into the 2 token Zombies, doing 15 damage from 18 attaks and obliterating them. They dig up a token in the process, going to 3 tokens and pretty much guaranteed to die next turn. They face the Soul Reavers so at least the strider Wights have to use a surge to flank them. Unfortunately, the Greater Earth and Earth horde (bane chanted!) to their right only manage 8 damage into a troop of Wraiths, then snake eyes the roll. So I don’t even have a reprisal when the sharp rocks die. Boo.
Over on the right, the surviving Mastiffs dig up a second token, step into the woods and unleash bees at the weakness Necromancer! Decent damage is dealt through the magic of throwing mastiffs receiving no negatives to hit. Craggoth skitters forward and hits the decrepit heretic with fireball 10, which adds a couple more damage (and shattering) despite being weakened. The Necro incinerates, which is Very Cool.
Finally, I hold the other Greater Earth on the left/center back, 12.5″ away from the Soul Reavers but unfortunately within range of the other Wraith troop. I legit forgot that they charge 14″ and thought I was being cagey 😦
Undead 3: So naturally those Wraiths charge the GEE to block him up. They do no damage but bleh. In other news, the Wights on the left chunk 6 damage into the Orb Lord, wavering him, while the Zombies on that flank mob the Earth horde (0 damage) and the Mastiffs (up to 5 damage). The sharpness Earth Elementals are indeed front charged by Soul Reavers and surge-flanked by the strider Wights. Despite being De 6, my dudes are absolutely wrecked, with their 3 tokens going to the Soul Reavers because Wights lose a lot by picking up a token (-2 Sp, no fly, no surge). Also the Wraiths in the center do a sterling 2 damage to their Greater Earth Elemental.
On the right, the sharpness Wights (hinder) charge Craggoth and do 7 damage, and the non-surge Vampasus (hinder) charges the 2 token Mastiffs in the woods and does nothing. I’ll take it.
Free Dwarfs 3: I am feeling distinctly behind at this point, with all the counters I setup to retake the middle stuck on stupid Wraiths. To wit, both Greaters counter-charge their Wraith troops and slaughter them (the Earth horde in the center helps out in a flank because they have nothing else to do). The Orb Lord fails his headstrong, freeing the fast Wights to do whatever they want (!!), but at least the Earth horde on the left flank routs some Zombies, taking their token. The Mastiffs over there chomp 3 damage into the other Zombies.
On the right, the Blade Lord flank charges (hindered) the sharpness Wights after the 2 token Mastiffs back 3.5″ away from the Vampasus in the woods. The Blade Lord and Craggoth smash 8 damage into the Wights but can’t nab the rout (Math-centric readers will note I should have done 10-11 damage, which is pretty gnarly with brutal tacked on, but my damage dice have been anemic this game.)
Undead 4: The Blade Lord is flanked by a (hindered) Vampasus and countered by the sharpness Wights, and is reduced to slag. Rip that guy. The Mastiffs on the left are also torn apart by Zombies, who scoop up their token, and the fresh Earth Elemental horde in the center, a De 6 -/18 unit, is one rounded by the strider Wights. What the living hell, Drew! But it’s not all bad news as the fast Wights don’t even waver the Orb Lord on 12 damage, and the Greater Earth charged by Soul Reavers holds firm on 9 damage, which is the first time Drew has rolled a statistically average round of damage.
Also the surge Vampasus on the left flies over and blocks the other Greater Earth from flanking the Soul Reavers and saving his buddy.
Free Dwarfs 4: I feel like I need a miracle to combat Drew’s insane damage dice at this point, but you what, I’ll take hot rout dice instead. The last of the Earth Elemental hordes (!) charges the fast Wights alongside the Orb Lord, putting the super ghosts to bed. Shortly after this, the Greater Earth in the lower left obliges the Vampasus and charges in, but I slam a double 10+ rout through and one round her! The other Greater Earth doesn’t work the same magic (5 damage on the Soul Reavers) but bane chanted (hindered) Mastiffs in the flank and Craggoth in the front does see the terror of the sharpness Wights ended as well. Two Wight hordes and one Vampasus is a heavy hit but Drew has two healthy hammers and two objective holders left to work with.
Undead 5: The Zombies (1 token) scramble 10″ into the flank of the triumphant Greater Earth, who takes 2 damage and cannot be bothered. The Soul Reavers (3 tokens) finish off the other Great Earth and prepare to receive his brother’s wrath, and the surviving Wights (their strider boots popped so they’re “just” a horde of Wights now) easily remove the last of my Mastiffs, scooping up their 2 tokens. The Vampasus once more spends a turn getting out of Craggoth’s LOS.
Free Dwarfs 5: The Orb Lord thunders into the rear of the Zombies, decimating them and taking their 1 token. The Greater Earth Elemental finally charges the 3 damage Soul Reavers, and routs them with the authority born of vengeance. He scoops up their 3 tokens (also the Stone Priest rear charged them to help but couldn’t wound). And Craggoth crashes into the last of the Wights, dealing 5 damage before he goes down.
Undead 6: With a Vampasus in the flank and Wights in the front, Craggoth succumbs to his wounds.
Free Dwarfs 6: I think for a while about just consolidating my position and winning 4-3, but realize that my Greater can’t escape the Wight’s 14″ charge, so may as well play for it. The Greater Earth drops his 3 tokens, ripping off into the Wights and dunking them too. He claims their 2 tokens, while the Orb Lord marches up and adds the GEE’s previous 3 to his 1.
Turn 7: Of course there’s another turn. Unable to see the Orb Lord, the Vampasus can either hinder charge a 2 damage Greater Earth Elemental or GTFO. He chooses discretion this time around, and the inspiring Necromancer flees for the hills as well.
I send my Greater powering after the Necromancer, forget that you can’t surge if you have tokens, but fall 1″ short of adding another kill marking to this Greater’s hull. Regardless, that’s 7-0 so a commanding …
FREEFORGED VICTORY
What a wild smashfest, and a real killing spree for that Greater Earth Elemental! He killed something like 800 points once he was allowed to move, single-handedly (cause he’s only got one 🙃) winning the game for me. Madness. It was certainly frustrating early on when Drew’s dice were hot fire, so my De 6 meant nothing, and my damage output was so bad that I had to trade down more than I already do. Happily we had all those rout spikes in Turn 4 and dug back out.
As for the list, I did decide to drop the throwing mastiffs and invest in the Priest a bit after this. I’m thinking of giving Wither & Perish (3) a try, still doesn’t give him anything to do on the way in, but does help me grind by making my dude’s effectively De 7 plus pushing some damage through against weak targets with a lot of nerve.
One of my favorite things to do on Thanksgiving is game, which can be hit or miss depending on how much travel is involved. This year I wasn’t traveling, so a quick text to my buddy Jeff confirmed that I would be gaming! With some time to kill before he and his vamps arrived, I busied myself with a little hobbying in the kitchen that would be ready to deploy after the carnage …
FREE DWARFS Earth Elementals Horde – Brew of Sharpness Earth Elementals Horde Earth Elementals Horde Stoneclaw Riders Regiment – Grenades Stoneclaw Riders Regiment – Grenades Mastiff Hunting Pack Regiment – Throwing Mastiff Mastiff Hunting Pack Regiment – Throwing Mastiff Greater Earth Elemental Greater Earth Elemental Dwarf Lord on Large Beast – Blade of the Beast Slayer Dwarf Lord on Large Beast – Orb of Towering Presence Free Dwarf Stone Priest – Stoneshapers; Surge (8), Martyr’s Prayer (7), Bane Chant (2) 2150 (12/22)
I alluded to wanting to take martyr’s prayer in the last report, so figured I should give it a shot. With the extra points I gave the Stone Priest the stoneshaper ability I discovered he didn’t come with any more (😬) and loaded the remaining Mastiffs up with bees. This would be my first time using throwing mastiffs, although I have certainly been on the receiving end.
Jeff is pretty sick of running his Undead at this point and theoretically working on Elves now, which will be loaded with shooting and Drakons, neither of which his Undead have. But what they do have is weakness! I’d prefer the inspiring Necro had bane chant instead (and the third Necro was anything else) but eh, Jeff is hot for budget weakness casters so I mentally prepared to grind even harder. Martyr’s prayer, don’t fail me now!
We rolled up Fool’s Gold and I’m pretty sure it’s the first time either of us had played it 😅 I kind of prefer it to Smoke & Mirrors as there’s less mental load, but really whatever, it’s my first time playing a Pillage variant with this army so would be good practice for the ‘Forged. Jeff won the roll and had me go first, I think mostly out of indecision.
BATTLE
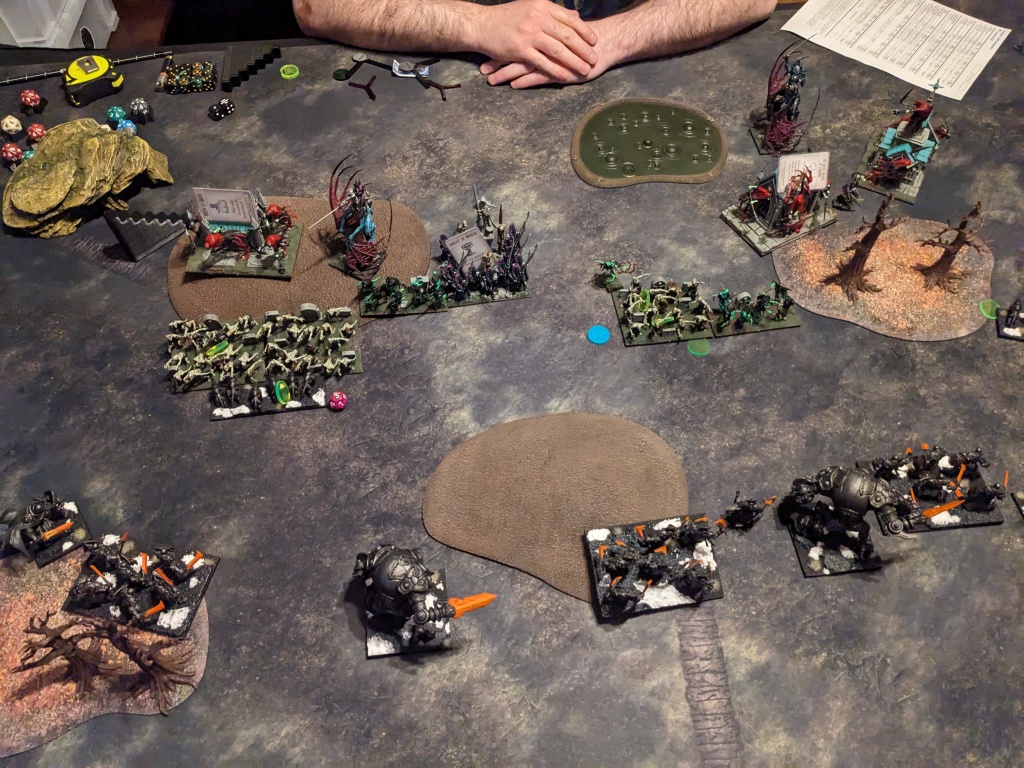
Turn 0: Battlelines! My Stoneclaws are still blank bases with drones on them, sorry readers. Also the inspiring Necromancer is the Warhammer Necro in a black cloak in the very center of the Undead lines.
Turn 1: The Freeforged struggle forward, with the Stoneclaws playing it cagey on the flanks. The only charge I give Jeff is his Vampire Lord into my blade Beast Lord …
… which Jeff takes 🫠 He hosts up and does a brutal 8 damage to my Beast Lord, who wavers but holds. Yowza was that closer than it needed to be. The rest of the Undead advance in a line, but Jeff does do some canny hiding of his Lykanis to protect him from Stoneclaws. Necros toss weakness onto both the Earth Elemental horde and Greater Earth Elemental that could mess with his Vampire Lord next turn.
Turn 2: Weakness or not, I send that Earth horde into the Vampire Lord, with the Blade Lord in the front when he passes headstrong. Bane chant fails on the horde but I roll like a maniac and drop the Undead blender hero in one go, reforming to face the incoming Mummies. The rest of the turn is spent holding vampires in place to buy me time to advance: the Orb Lord disorders the strider Soul Reaver Cav (4 damage), Mastiffs leap off the hill into the other Soul Reaver Cav (1 damage), and the other Mastiffs scamper into the right Soul Reaver Infantry (0 damage but they didn’t have any TC to strip anyway). Stoneclaws on the left back away from the Lykanis while the ones on the right threaten a dive into the Undead lines (and toss a grenade at the right Wraiths to no effect).
To get the murder out of the way, Jeff kills both Mastiff packs and backs his vamps up. The strider Soul Reaver Cav carve 5 damage into the Orb Lord, whose flank is officially being threatened by Soul Reaver Infantry as well, and the Mummies (hindered) charge the Earth horde that saw their master off but only do 2 damage. Wraiths nicely block the flank of the Mummies from the right Stoneclaws, while the Wraiths and Lykanis on the left play escort for their own Mummies’ advance. Finally, weakness is liberally applied to the Orb Lord and the right Greater Earth on the hill.
Free Dwarfs 3: Strap in, it’s going to be a violent if not decisive turn as we begin the grind. From left to right, a Stoneclaws regiment and the sharp Earth horde charge and shatter a Mummy regiment. The Orb Lord (now CS0) really doesn’t want to be flanked by the Soul Reaver Infantry in the woods, so withdraws 1″ from the Soul Reaver Cav, turns 90, walks towards the SRI and rotates to face … moments before a Greater Earth Elemental plows into the cav (~5 damage total). The other Soul Reaver Cav receive an Earth horde to the face (off the central hill) (7 damage total), and the Soul Reaver Infantry to the right are charged by the weakened Greater Earth (who may or may not have been on the hill) (6 damage total). The right Mummies are combo-charged by an Earth horde and the Blade Lord (5 damage), and finally, the Stoneclaws fly over the Wraiths and charge the weakness Necro lurking behind them (5 damage). Frustratingly they fail to pop the old sack of bones.
Worth noting that bane chant on the Earth Elementals fighting the Soul Reaver Cavalry failed (0 for 2).
Undead 3: Damage is poured across the battlefield as the vampires sink their fangs into the sweet, irony hides of the Freeforged. Jeff starts things off by rolling for the Soul Reaver Infantry (hindered) into the Orb Lord on 5 damage, as he’s inspiring all of my left flank. They do a wild 8 damage, bringing him to 13, before snaking the roll! Catastrophe! I am compelled to note that probability puts that at 5 damage and a rerolled 7 to rout, but Jeff cares not for maths.
Recovering from disaster, Jeff still has a lot of dice to roll. The Wraiths on the left pick things up by illegally flank charging the sharp Earth horde, who they couldn’t actually see past the H4 Stoneclaws but big shrug (1 damage). The Stoneclaws themselves are disordered by the Lykanis (2 damage), and the Greater Earth Elemental takes 4 damage from the disordered strider Soul Reaver Cav. The central Earth horde takes 5 damage from the other disordered SRC, and the SRI to the right shred 6 into their GEE – note the Wraiths who have stalled out 0.5″ from the big guy’s flank, Jeff being unable to roll the 2″ surge required. On the right, the Mummies hammer the Blade Lord to 9 damage but he holds.
Finally, weakness goes up on the sharp Earth horde preparing to blend the flank of the Orb Lord’s reavers. Note as well that all those vamp units have lifeleeched 2 damage and the Mummies on the right have gone from 5 damage to 0. Nice.
Free Dwarfs 4: All the bluff tokens turn over at the end of Turn 3, as seen in the first shot here. Jeff put one of his 1 pointers hard right amidst all that impassable terrain, and his other ones in my deployment zone. Not a bad idea – his Wraiths often jump the enemy line and can play for deep objectives, plus my dudes are slow and go in one direction while he can march and is overall quite fast. Obviously I’m content to grind for 4 points down the middle of the board.
Even with all the healing last turn, I aim to put some vamps into the dirt and start heading for points. We pay Jeff’s snake eyes back by flanking those Soul Reavers with the sharp Earth horde, whose weakness is countered by my bane chant (1 of 3 at last) and the Orb Lord in the front. They die the true death. The central Soul Reaver Cavalry are likewise turned to ashes by a regular Earth horde going to work, and the Soul Reaver Infantry next to them are buried by Stoneclaws in the flank and the Greater Elemental in their front. RIP to all those suckers.
In other news, the Lykanis is booped for 2 damage by disordered Stoneclaws, the last of the Soul Reaver Cavalry are wavered by their Greater Elemental on 9 damage, and the Mummies are driven back up to 9 damage by a particularly spirited Earth horde and Blade Lord combo.
Undead 4: With the execution of his vampires, Jeff is wildly spiraling away from this game but we persevere. Wraiths sandwich the central Earth Elementals, spooping them up to 12 damage but no rout. The Mummies on the right do kill the blade Beast Lord at long last, reforming to face the right Earth horde, and dropping to 4 damage in the process. And the Lykanis on the left jumps up and dunks his Stoneclaws up to 5 damage.
Triple weakness is tossed around again this turn, but only weakens the right Earth Elementals, failing to cast elsewhere twice.
Free Dwarfs 5: Heat blades rise and fall as the Freeforged end more of the Undead menace. From left to right, the sharp Earth Elementals EZ charge into the flank of the Lykanis fighting the Stoneclaws, routing the pup with ease. The Orb Lord lines up to race for a bottom token next turn (I don’t understand why he didn’t reform last turn to do something useful? Like kill the weakness Necro right next to him?), shortly before the Greater Elemental next to him ends the Soul Reaver Cavalry it’s fought turn after turn. The Earth Elementals trapped in the Wraith sandwich attempt to escape but only deal 3 damage to one of the Wraiths, while the Stoneclaws that could have rear charged the other troop of ghosts instead try to kill the inspiring Necromancer and overrun into them. They deal 2 damage and get stuck on the loathsome heretic (yes yes I got greedy here). However, some overruns work better than others as a Greater Earth Elemental crashes into and through a weakness Necro and into the flank of the Mummies, shattering them with the help of the weakened Earth horde to their front.
Bane chant, by the by, was attempted on the sandwiched Earth Elementals but failed (1 of 4).
Undead 5: The Wraiths tear the beleaguered Earth Elementals apart and face their large metal enemies. The inspiring Necro (disordered) attempts to ground some Stoneclaws but no dice, and the surviving weakness Necro also fails in whatever it was doing.
Free Dwarfs 6: The sharp Earth Elemental horde charges the last weakness Necro, crumbling it and claiming a point, as Greater Earth Elementals thunder into the Wraiths. The wounded troop expires while the other takes 3 damage. And I claim 3 other points, bringing me to 5 total, largely thanks to Stoneclaws.
Also I cast martyr’s prayer for the first time this edition, healing 2 damage from the Greater Elemental engaged with the Wraiths. Hell yea.
Undead 6: The Necromancer has a go at my Stone Priest, and while he lands the hit my caster is too tough to wound 😤 The Wraiths scrabble my Greater back to 6 damage.
Free Dwarfs 7: Of course there’s more 🤦♂️ The Wraiths are hit with 36 CS3 attaks and disappear, and Stoneclaws swoop down on the inspiring Necromancer and silence his babbling at last. And I cast martyr’s prayer, healing a Greater down to 2 damage because I can. Since I claim all but 1 point, this is a commanding …
FREEFORGED VICTORY
Poor Jeff, that’s two tablings in a row versus me, playing wildly different armies. It was instructive to see that I can grind one-to-one versus the most serious blenders in the game, which sort of became the game plan back in Turn 3 or whatever, even tho Jeff’s dice combined with LL2 meant that was a pretty high risk way to play it. He’s played his Undead for a long time and could really do with a new army that would let him learn new tactics and generally be more invested again.
As far as my testing goes, I never used my throwing mastiffs and I suspect I rarely will. When I mobilize my chaff it’s almost always to go get in the way, which necessitates running forward more than 6″ and not surviving, both of which are bad for getting a shooting attak off. Martyr’s prayer certainly existed? I suspect it’s only really going to be used in Turns 1-2 as I close with a shooting opponent. I can think of several games at Crossroads where it would have been great (i.e. the ones where I was getting shot) but it doesn’t come into play much ironically when the grind begins, where I would much rather be bane chanting to come out on top faster rather than pulling a few damage off to extend the grind. IMO people mostly take highly effective damage dealers when it comes to melee, not plink damage, and while the high end of MP is grand (7 damage! Imagine!), I don’t think the 3-4 you usually get is going to matter. Maybe only on De 6+ units? Clearly I am torn, but would rather have the third Mastiffs so adios for now.
The Stoneclaws continue to be great. While they frustrated me by failing to pick up Necromancers on demand, it was nice to have the option to reach over and slap a caster / look for overruns, which isn’t something I’ve had much of. The birds are also gods on Pillage scenarios, which I could have told you having faced Scorchies and their ilk before. I’ll admit to not liking them a bit for how easy they are to play 🙃
The next tournament in the Northeast is my club’s own Dead of Winter on January 20 (2024), which is 2150 and has an added comp restriction of no more than three of any unit. At first, I thought this locked me into Herd for the second DoW in a row, which I was mostly ok with but not ultra excited about, as my list is really congealed at this point. I ended up with about 50 or so points to play with after Clash discounts on Tribal Spears, which I finagled into a Forest Warden – a unit I like, and that finally inspires as well. I played a couple games (tabled Undead, did bad things to Riftforged) but it wasn’t all that exciting after a year of Herd.
Then I realized I could take my plan for Freeforged 2300 (spoilers: adding birds) and just dial it back to 2150 really easily and still meet the comp. This keeps me painting and playing my new army, which is 100% where I prefer to be hobby-wise. Here’s the list:
FREE DWARFS Earth Elementals Horde – Brew of Sharpness Earth Elementals Horde Earth Elementals Horde Stoneclaw Riders Regiment – Grenades Stoneclaw Riders Regiment – Grenades Mastiff Hunting Pack Regiment Mastiff Hunting Pack Regiment Mastiff Hunting Pack Regiment Greater Earth Elemental Greater Earth Elemental Dwarf Lord on Large Beast – Blade of the Beast Slayer Dwarf Lord on Large Beast – Orb of Towering Presence Free Dwarf Stone Priest – Conjurer’s Staff, Surge (8), Bane Chant (2) 2150 (13/23)
I was always going to add birds to the army, even before we got Clash confirmation that they would be in Free Dwarfs, and because my minis have guns on them I’m pretty much locked into grenades. These are wild shooting attaks if you aren’t aware of them: 12″, Att: 4, Ra: 4+, Piercing(1), Shattering, Blast(D3). No steady aim means 5+ at best, 6+ most the time, adding to the WTF dice factor. I kind of love it. The other difference between Stoneclaws and Frostclaws is that the Free Dwarf version trade Fury for Pathfinder and don’t freeze the target in melee. This is great by me and the pathfinder has come up in both my games so far. Fury is a lot less useful on regs, but also in general because of TC(2) and no CS.
The rest of the list should be familiar from 2300. I have an alternate load out with two Mastiff Packs that shoot plus martyr’s prayer on the Stone Priest … but I think I prefer having more drops and less points invested in a caster who is slow and can be turned off. On the flipside, MP(7) is really gnarly alongside all that D6+ So I dunno. Going to paint the pups up anyway and see how things fall in January.
My buddy Cory is working on a new Nightstalker army and this would be his first game with his initial list, so forgive the proxies and blank bases (also excuse mine while you’re at it).
Sweet baby cats, that Blood Worm legion is going to eat anything it wants 😬 My goal is to feed it trash and I guess never engage it? Yuck. Otherwise Wind Blast (22) didn’t sound great, and Butchers seemed poised to open up some cans. Especially when you consider that I thought they were Me 3+ and not 4+ as is the reality of the situation.
We chose to play Hold the Line! because it’s new and a nice meld of Control and Dominate. Cory won the roll but had me go first, quite explicitly so he could blow me out of the scoring bands in the last turn. (Sorry ahead of time for the early game photos, I kept forgetting to take them and either remembered during his turn or just forgot. We’ll figure it out.)
BATTLE
Turn 0: Battelines! His blanks are Soulflayers, my blanks are Stoneclaws (with drones on them) or the third Mastiff pack.
Turn 1: The Freeforged trudge forward, with the left Stoneclaws getting into a weird position but threatening things? They outspeed the Soulflayers over there so I’m vaguely trying to push them back. I surge the central Greater Earth forward because he’s D6+ and -/19 in a puddle, and if he dies it’ll pull all those Butchers into my clutches. Except I wasn’t planning on 7 out of 8 dice catapulting him forward 😀
That 7″ surge puts the GEE into the Ravagers 12″ range, meaning they don’t have to move and light the big dummy up. Combined with a Mind-Screech’s lightning, he takes a concerning 5 damage, plus is blasted back 1″ or so. The rightmost Stoneclaws also cop 1 damage from lightning, and somebody else must have been pushed back by the Soulflayers? Hard to tell in these shots. The most relevant movement is the Shadowhounds zipping down the left flank and becoming unflankable by hugging the impassable over there.
Turn 2: I charge the right Stoneclaws (hindered on a wall) into the Dread-Fiend for 1 sweet damage, and try to shoot the Shadowhounds with my other birds but 7+ is tough. Otherwise my slow children struggle forward or are Mastiffs being sent into danger.
The Nightstalker side of things is more exciting (and pictured above). While Cory’s army doesn’t move much, it certainly pushes mine around. The left Stoneclaws and Earth Elemental horde are blasted backwards 4-5″ as is the orb Beast Lord on the right. Lightning and another round of Ravager shooting goes into the central Greater Earth, blasting him up to 8 damage. Phantoms block my rightmost Earth horde and the Blood Worms continue oozing through that forest. In combat, the Dread-Fiend chomps 4 damage onto the right Stoneclaws, wavering them.
Turn 3: (The shots above are again from the NS side of the turn, sorry.) It’s largely another delaying turn for me, as I send Mastiffs into the Shadowhounds (they disorder their shadowy cousins but not much else) and hit the left Butchers in the front and flank (hindered) with more Mastiffs, for 3 damage. The smoldering central Greater Elemental crashes into the Ravagers, beefing his attaks and doing just 2 damage. Woof. A combo-charge from the other Greater and right Earth horde rout the Phantoms and I leave the units side by side for Cory to decide what his Soulflayers and other Butchers are doing next turn. In Beast Lord news, the Blade Lord sneaks into the left Mind-Screech, popping decent damage into it, while the Orb Lord cycles into the Dread-Fiend when the Stoneclaws back up and nimble out of the way. Whiiiich I realize now is illegal, because they lost their nimble when they were disordered. (In my defense, I very rarely play flying units!) Anyway, the Orb Lord brings the Fiend to 5 damage.
In response, the Blood Worms continue to slowly press the issue on the left, as the right Soulflayers and Butchers combo the rightmost Earth Elemental horde (for a solid 9 damage). The central, sharp Earth horde is blasted backwards, as are the left Stoneclaws. Otherwise there’s a lot of counter-charging: the Shadowhounds rout their Mastiffs, the left Butchers smash the Mastiffs to their front, the Ravagers finish off their Greater Earth Elemental, and the Dread-Fiend does 2 damage to the Orb Lord. The Blade Lord is unphased by his Mind-Screech (who may have been wavered).
Free Dwarfs 4: Whelp, here we go. An Earth Elemental horde powers off the hill into the Blood Worms, might as well get that TC(1) while I can. The Stoneclaws supporting them are faced with continuing to play it cagey, contributing some wounds to the Blood Worms before being killed by the Shadowhounds, or locking down the left Soulflayers before being killed by the Shadowhounds. I decide to put the Soulflayers on the ground and charge in. Continuing to the right, the Blade Lord charges the Mind-Screech again, the sharpness Earth horde hits the Butchers beset by Mastiffs to their flank, Stoneclaws long bomb into the flank of the Ravagers, the surviving Greater Elemental hits the right Soulflayers, the Earth horde fighting Butchers fights Butchers, annnnd the Orb Lord continues scrapping with the Dread-Fiend.
A quiet farting sound can be heard as bane chant fails to cast on the non-sharp Earth horde, then the heat weapons begin to fall. From left to right: Stoneclaws do a sterling 5 damage to Soulflayers, the Earth horde punches 3 into the Blood Worms, the Blade Lord routs the Mind-Screech, and the sharp Earth Elementals cut down the Butchers, with the Mastiffs reforming to block the Reapers from charging the horde, who reform to face the Blood Worm flank. The central Stoneclaws slam the Ravagers up to 12 damage but biff the Nv check. The Greater Earth slams 5 damage into his Soulflayers, the final Earth horde hurts their Butchers but can’t hot hand the Nv check, and finally the Orb Lord drops the Dread-Fiend and faces said Butchers.
Nightstalkers 4: (The prelude to this carnage was captured in the previous shot.) The ‘Stalkers slap back in what feels like the beginning of the end. Shadowhounds and Soulflayers eat the left Stoneclaws, the Blood Worms take a massive 10 damage chomp out of the left Earth horde (who hold), and the Reapers grind 5 damage out of the Blade Lord. The Ravagers see their Stoneclaws off (THIS UNIT Y’ALL), the Soulflayers fighting the Greater Earth do no damage, and the Butchers break their Earth horde and stay facing forward as it protects them from a charge from the GEE.
Free Dwarfs 5: Nothing tricky for the Freeforged this turn. The sharp Earth horde flanks the Blood Worms, with more Earth Elementals in the front. The Blade Lord swings into the Reapers with just CS(1). The last of the Mastiffs try to finish off the Ravagers (hindered). The Greater Earth Elemental hits the Soulflayers again, and the Orb Lord flanks the Butchers (hindered).
The Stone Priest successfully bane chants the Orb Lord! After the murderizing is done, the Blood Worm legion is no more, the Reapers take 3 damage but hold, the Mastiffs land 1 damage on the Ravagers but can’t roll the 6 to kill (they waver), the Greater Earth wrecks the Soulflayers, and the Orb Lord pushes the Butchers to 11 damage but again can’t land the rout.
Nightstalkers 5: While Cory’s gribblies are looking light on the table, I feel like he’s got some game left in him? The Shadowhounds plow into the 10 damage Earth horde, routing them. The Soulflayers EZ charge into the flank of the Blade Lord fighting the Reapers, which I did not see coming, routing him as well. The Ravagers disengage from the Mastiffs in their swamp, letting the Mind-Screech lightning them for 1 damage. And the Butchers counter the Orb Lord in their flank, pounding him up to 7 damage.
Free Dwarfs 6: With the game ending, it’s time to finish some thoughts. The sharp Earth horde charges and routs the Shadowhounds, claiming the left zone in the process. The Mastiffs charge the Ravagers a second time (hindered forever), sneaking that 1 damage through and this time popping them. What a menace. The Greater Earth entrusts the Butchers’ demise to the Orb Lord, surging into the Mind-Screech’s flank and also being bane chanted for no functional purpose because I thought the Stone Priest still had his stoneshaper rule (turns out it’s optional in COK ’24). I roll like a muppet and do like 5 damage to the Mind-Screech with 24 CS(3) attaks but still waver it. Finally, the Orb Lord does cut the badly wounded Butchers down. He sidesteps into the right zone.
Nightstalkers 6: Cory dives his survivors into the central zone. If there’s a Turn 7 I’ll be able to claim all the zones, but as it is I’m up 4-3 and this is a …
FREEFORGED VICTORY
Credit to Cory on removing so many of my strong metal children! Early wind blast was annoying but apart from that the NS plan was pretty familiar to other large infantry with support style armies I’ve faced. Slow stuff in middle with faster and faster stuff on the flanks, which is basically what I did with the birds too. Speaking of birds, these are really amazing units that can do so much – which shouldn’t be a shocker to hear, I’m just really unused to using meta units and getting so much value. The shooting is definitely weird but I’ll be keeping it around, even if it plays a far distant fiddle to being able to slam in from the flanks and grab unexpected angles. Good stuff.
Round 4 dawns and, after some shuffling of match-ups, Cuddle Time is facing off against the cruel embrace of Venereal Taint! Yes, this does mean there’s a chance that Mikael and I rematch, but because he can control his fate this time, I’m matched into the new and improved Northern Alliance. I choose Loot as it’s the best option of those available (only six scenarios are in the pool each round).
Game 4: Northern Alliance
Frostfang Cavalry Horde – Tundra Fighters, Staying Stone Ice Elementals Horde – Blessing of the Gods Human Tribesfolk Horde – Tundra Fighters, Chalice of Wrath Half-Elf Berserkers Regiment – Boots of Striding? Ice Kin Hunters Regiment Ice Kin Hunters Regiment Ice Kin Hunters Regiment Frostclaw Riders Regiment – Ice Bombs? Snow Foxes Regiment Hrimm, Legendary Ice Giant – Icy Breath (12) Serakina, the Ice Queen – Surge (8), Wind Blast (6) Ice Queen – Blizzard (2), Bane Chant (2) 2300 (12/26)
I don’t have Brad’s list, so have made some educated guesses. There are 5 points left, so maybe the Berserkers had something else? The birds may not have had bombs either. All the same, loads of shooting and heaps of frozen to make me go even slower, with wind blast in there to make me go negative inches forward when possible. And I’ll say it right now: Serakina really is the worst.
Craggoth scouted up onto a token, at which point Mikael informed me he couldn’t pick it up, which was fine. Sad for what’s about to happen, but fine. Brad’s Ice Kin Hunters scouted into range, then he won and took first turn, and I begin to have a concern.
BATTLE
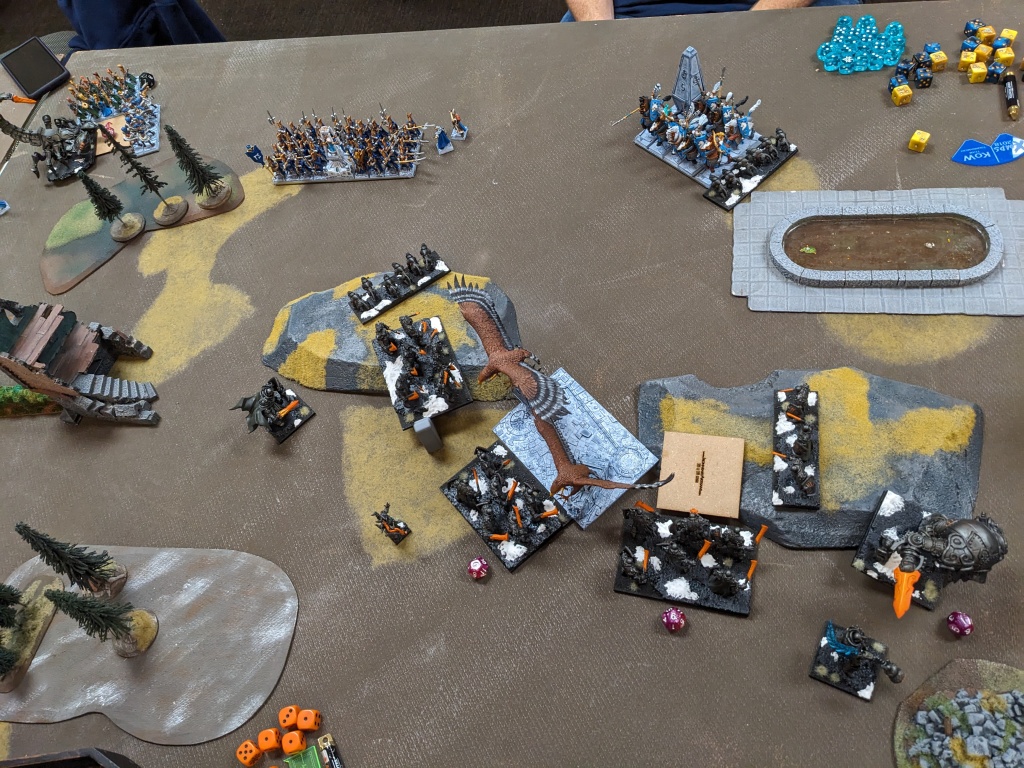
Turn 1: The Northern Alliance advances on the wings, forming the classic death crescent. Ice Kin Hunters and the Ice Queen with blizzard spike 4 damage into the central sharpness Earth Elemental horde, freezing them down to Sp 4. Oof. On the left, the Ice Elementals and Serakina do 5 damage to Craggoth, freezing him to Sp 5 and wind blasting him several inches to the left (if he could have picked up the objective he would be immune to wind blast). Double oof.
The Freeforged shamble forward in response. Mastiffs provide some cover to the sharp Earth horde in the center, as well as stop them when the Stone Priest surges the slow horde forward a couple inches. Craggoth skitters back over to the token and picks it up. If his fireball was in range to the Ice Elementals, it completely fluffed.
Turn 2: Brad hardly moves, simply adjusting a couple facings and pulling the Frostclaws and Frostfangs back as reserves. Ice Kin Hunters and the Ice Queen deal 12 damage to the central Mastiffs, removing them. Serakina wind blasts the orb Beast Lord on the left backwards, freezing him to Sp 6, and the Ice Elementals push Craggoth up to 10 damage, freezing him again.
With Brad’s Ice Elementals rolling so well, I decide to evacuate Craggoth while I still can, scuttling him back towards my lines with token in tow. The rest of the iron line powers forward as fast as it can. Mastiffs on the right pick up another token, as the sword Beast Lord plows through the wood and charges the Berserkers (hindered). He does 2 damage (…) but has stripped their TC and is out of Hrimm’s LOS.
Northern Alliance 3: In which I discover that the Frostclaws can in fact fit into Craggoth’s flank. Good eyes, Brad! The birds charge the giant metal scorpion. The Berserkers counter-charge the sword Beast Lord, with the Frostfangs joining them. Hrimm’s frozen aura freezes the Free Dwarf hero for chad for good measure.
In shooting, the Ice Elementals, the blizzard Ice Queen and Serakina do 5 damage to the left Greater Earth Elemental, shoving him several inches backwards. The sharp Earth horde in the center goes up to 7 damage and is frozen thanks to the Ice Kin Hunter firebase, and Hrimm breaths on the Mastiffs, freezing and wavering them on 4 damage. In combat, the Frostclaws tear Craggoth apart, scooping up the token and overrunning 2 inches. And the Berserkers and Frostfangs do 8 damage to the sword Beast Lord, wavering him.
Free Dwarfs 3: Determined to rest some control back, I charge the orb Beast Lord into the Ice Elementals (hindered over the wall) and an Earth Elemental regiment into the waiting horde of Tribesfolk. The Greater Earth on that flank pushes up to the wall and hopes he gets to charge somebody at some point (Brad later told me he would have surged the GEE forward, and while I could maybe have gotten my Sp 4 caster into range, I think it would have pulled his inspiring away from dudes who needed it? Spoilers.) Neither combat is brilliant (3 damage to the Ice Elementals and 4 to the Tribesfolk) but those units are in one place now and not shooting.
On the right, my sword Beast Lord fails his headstrong (the Dwarven Curse strikes!), which sees an Earth regiment charge the Berserkers unsupported as the right Greater Earth charges the Frostfangs. I roll pretty great but 5 damage and 7 damage respectively isn’t enough to do much. You can see I’m already preparing to scoop up tokens with my rear Earth Elemental horde once the sharp Earth horde pops, which has claimed the center token for now.
Northern Alliance 4: Brad begins by backing up 2/3 of his Ice Kin firebase. Success 😤 Otherwise everybody counter-charges their dance partners, as the Frostclaws drag their token towards my table edge and Hrimm and the Snow Foxes mill about. Serakina freezes and wind blasts the left Greater Earth back again (*sigh*), before the Ice Kin Hunters and Ice Queen push the central sharp Earth horde to 11 damage, freezing them of course. Hrimm breaths on the Mastiffs again, and once again freezes and wavers them (on 6 damage).
In combat, the orb Beast Lord takes 2 damage from the Ice Elementals, losing his TC2. The Earth regiment next to him is, however, utterly dismantled by the Tribesfolk horde. On the right, the Berserkers chip 3 damage onto their Earth regiment, and the right Greater Earth takes a sterling 9 damage from the Frostfangs. Note that thanks to Hrimm’s chilling presence both units were frozen, which triggered tundra fighters (vicious) in the NA troops. Nice.
Free Dwarfs 4: A turn too late, I send the left Greater after the non-flying, non-nimble, Sp 5 birds carrying the token. It isn’t wonderful but I feel like it’s better than getting aced by the Tribesfolk when Brad feels like it. The orb Beast Lord hits the Ice Elementals again. On the right, the Berserkers cop a combo-charge from a Earth Elemental horde and regiment, as the Frostfangs receive the combined attention of the slayer Beast Lord and the right Greater Earth. The Mastiffs drop their token and the reserve Earth horde picks it up. Finally, the sharp Earth horde sidesteps 2.5″, dragging their token closer to my deathball.
Combat is decisive on the right, with both NA units bludgeoned into the snow. The orb Beast Lord on the left successfully disorders the Ice Elementals (4 damage total).
Northern Alliance 5: Serakina signals that it’s time for the Alliance to move this turn! Mostly! The Frostclaws drag their token into the leftmost woods, the Tribesfolk saunter towards the central token and melee, as the Ice Kin Hunters mostly decide they’re good where they are, except for one unit that charges into an Earth Elemental horde before they get charged. Hrimm plows into an Earth regiment (freezing everyone within 6″) and his pet Snow Foxes leap on the right Greater Earth.
Serakina freezes and wind blasts the left Greater Earth sideways, ensuring it can’t catch the birds this turn or next. And the two Ice Kin Hunters with the help of the Ice Queen’s blizzard finish off the sharp Earth horde after 5 turns of shooting it. Result. In combat, the Ice Kin Hunters do a single damage to the Earth horde (respect), before Hrimm obliterates his Earth regiment and the Snow Foxes preposterously drag down the wounded Greater Earth! Best Swarm 2019-2023. Also it looks like the Ice Elementals lost their damn minds and did 10 damage to the orb Beast Lord, but the dude held on 12 damage. Wow.
Free Dwarfs 5: The Greater Earth on the left stumbles forward 5″, honestly to get away from Serakina more than anything. Otherwise, the orb Beast Lord counters the Ice Elementals again, the Earth horde fighting Ice Kin Hunters fights Ice Kin Hunters, the sword Beast Lord gleefully charges into Hrimm (hindered), and the Mastiffs charge the Snow Foxes, fancying a chaff off. My reserve Earth horde scoop up the token dropped last turn, adding it to their other one.
The Stone Priest fails to bane chant the Earth horde fighting elves, then it’s on to combat. The orb Beast Lord continues to do 2 damage a turn to the Ice Elementals (5 total after Serakina’s radiance), the Earth horde does a solid 7 damage to the Hunters, the sword Beast Lord slams 3 into Hrimm, and the Mastiffs chomp 2 into the Foxes. Nobody cares but everybody is disordered.
Northern Alliance 6: Brad draws the noose tight, but will it be enough? The Tribesfolk flank the Earth horde embroiled with the Ice Kin Hunters, as more Ice Kin Hunters flank the sword Beast Lord fighting Hrimm. The Foxes counter the Mastiffs and the Ice Elementals do the same to the mangled orb Beast Lord. The Frostclaws drag their token through the woods, away from their giant, dogged pursuer. Sadly (for me), Serakina finds the angle and shoves the Greater Elemental sideways again, frozen forever.
In combat, the Earth Elemental horde holds on 10 damage! Helped I’m going to guess because bane chant on the horde failed? Hrimm and the Snow Foxes can’t fail tho, dropping the Beast Lord and Mastiffs. But the roller coaster continues as the Ice Elementals can’t wound the orb Beast Lord clinging to life.
Free Dwarfs 6: Unexpectedly, I might have this! I delightedly hit the Tribesfolk horde in the front and flank with Earth Elemental hordes. It lives when I beef the Nv test (IIRC I needed like a 4-6 and rolled very low). The orb Beast Lord hits the Ice Elementals yet again, but I don’t think broke them. And the left Greater plods after those damn birds, having never swung all game.
Thankfully there’s no Turn 7, making this a …
FREEFORGED VICTORY
Wheeeeeeeeeeeeeeew what a game, and pretty unique for Kings of War, with so many movement debuffs. Pretty sure I gave Brad my favorite opponent vote as well. Overall, it was really cool to see the new Northern Alliance functioning as the combined arms force it was designed to be, and I appreciate that while Frostclaws did technically do some really meaningful work, it wasn’t through spamming them or going hard alpha, but carefully timed play. Also special shoutout to Ice Elementals going to 12″ shooting as being one of the best hidden buffs, it synergizes really well with frozen’s -1 Sp. Finally, Serakina can go straight to hell.
Round 5 puts Cuddle Time up against Barry’s Bathwater Experience, somewhere just below the middle of the pack. I end up against Mike, a dude I actually played in the first round of Pilgrimage 2023, in a battle which some day you’ll get to read about 😬 While I was playing Herd last time we met, Mike is still rocking Varangur, except on the other side of the update.
Game 5: Varangur
The Fallen Horde – Brew of Strength The Fallen Regiment – Staying Stone Human Tribesfolk Horde – Chalice of Wrath Human Tribesfolk Regiment – Orb of Towering Presence Mounted Sons Regiment – Helm of the Drunken Ram, Guise of the Deceiver Mounted Sons Regiment – Boots of Striding, Guise of the Deceiver Night Raiders Regiment – Fire-Oil, Bows Draugr Regiment Draugr Regiment Snow Foxes Regiment Magnilde of the Fallen Kruufnir Magus on Horse – Boots of Levitation, Knowledgeable; Alchemist’s Curse (4) Skald – Lute of Insatiable Darkness; Bane Chant (2)
That’s 3 AC(4) casters out of 5 games! My plan for Mike’s is the same as the other ones: ignore them unless they get within 14″ of a Beast Lord (they won’t) and try to kill faster than they can melt my large metal children. Otherwise the list is fairly standard Varangur, with more variety than I’m used to but looks like he was trying out some of the improved infantry options. For reference, he had more shooting at Pilgrimage, as well as a Frost Giant which I did my best to frustrate and keep wandering around not doing much 😉
We’re playing Dominate because I chose scenario 😛 Craggoth scoots up a flank and I win and take first turn. Off to a good start.
BATTLE
Turn 1: The Freeforged stomp forward once again, with Mastiffs scampering ahead to be annoying as Craggoth scuttles up the flank more conservatively than usual, thanks to the Fallen’s presence.
The Varangur line advances apace, the standouts being the Fallen regiment cresting the hill and the Magus whipping down the left flank. Using the power of his horse’s magical boots (???), the Magus is able to cast while marching, scorching 5 damage into the leftmost Greater Earth Elemental. So it begins. Also the Night Raiders land a cheeky damage on Craggoth with their bows, the scamps.
Free Dwarfs 2: Declaring my hatred of the Fallen, I hit Mike’s regiment with Mastiffs and the sword Beast Lord in the front and Craggoth in the flank. They explode spectacularly. I overrun the Mastiffs to jam the Fallen horde but they only go 1 inch, which means I have to reform Craggoth in such a way that Kruufnir (and the Night Raiders) are in his flank. He’s a tough scorpion so how bad can it be? In other news, I punch the left Mastiffs up 12″ to be in the way of Mike’s Tribesfolk, who must be within 11″ of my sharpness Earth horde.
Varangur 2: Things start to get messy as the Varangur make contact across the line. The Tribesfolk regiment hits the waiting Mastiffs, Snow Foxes whip into the sharp Earth Elementals, Draugr hit an Earth horde and regiment, the Fallen horde obliges and charges the Mastiffs in front of them, and Craggoth is hit in the front by the drunken ram Mounted Sons regiment (so that’s CS1+TC2) and the flank by Night Raiders (who have TC1). Kruffnir abstains from combat, instead nimbling around the legendary titan. Finally, the Magus circles his Greater Earth target and Magnilde uses her once per game fly to land within the Freeforged lines, glaring at the Stone Priest.
There is a brief pause broken by the shrieking of superheated metal as the Magus curses the GEE up to 9 damage, after which the axes descend. The Tribesfolk deal 7 damage to the left Mastiffs, who hold. The Snow Foxes and both Draugr regiments deal a single damage to their targets, leaving the elementals unphased. The Fallen horde dunks their Mastiffs unceremoniously, and Craggoth takes only 10 damage from his aggressors.
Free Dwarfs 3: Craggoth, very much alive, kicks things off by flanking his Mounted Sons for great vengeance. I send the left Mastiffs in to block up the horde of Tribesfolk, and use that safety to put the central Greater Earth into the flank of the Snow Foxes. Earth Elementals counter the Varangur chaff down the line (Snow Foxes, Draugr, Draugr). I back up the sword Beast Lord to keep the Fallen horde, the Night Raiders and Kruufnir in his front, rather than charging, getting stuck and flanked / reared. On the left, I decide the melting Greater Earth is basically dead, so push him into the woods and invite charges from the Mounted Sons and/or the Tribesfolk regiment. I turn the left Earth regiment around and prepare to surge 4″ into Magnilde. It won’t save my Stone Priest unless they kill her but crazy dice happen … but I roll 3″ out of 8 dice and they fall short (seen in the left photo below).
After this turn Mike wondered why I didn’t charge the central Greater into the Tribesfolk horde? The Mastiffs could have easily protected his flank from Sons or the Tribesfolk regiment, and the sharp Earth horde did not need help against the Snow Foxes. I didn’t have a great answer apart from being scared of the horde killing my big guy … but would now like to know why I didn’t help clear off the Draugr to the GEE’s right? It would have been great to have that horde freed up a turn earlier, and very much looks like he can their flank.
Anyway. Craggoth splatters those Mounted Sons and turns to face the Fallen horde, showing his butt to the Night Raiders and yet again tempting Kruufnir. Those Snow Foxes are turned to mist, and the Draugr get slapped around (5 damage and 3 damage). The Tribesfolk horde takes a damage from the Mastiffs.
Varangur 3: Screaming Herja’s war cry, Magnilde charges into the Stone Priest lurking in the central forest. The cry is taken up throughout the Varangur host as the Mounted Sons launch into the damaged Greater Earth Elemental (they pop boots to avoid hindering), the Tribesfolk regiment charges the sharp Earth horde, the Fallen hit Craggoth in the front with Night Raiders in the rear, and Kruufnir lopes into the flank of the Earth regiment fighting Draugr. The horde of Tribesfolk deal with their Mastiffs and the other Draugr regiment flails against their Earth horde again.
The Magus sears 6 (!) damage into the orb Beast Lord, and then it’s on. The Mounted Sons down their Greater Elemental and the Tribesfolk horde bashes the last of their mechanical Mastiffs down. That’s the end of Mike’s good news, however. The Tribesfolk regiment does 1 damage to the sharp Earth horde, the Stone Priest holds after taking 6 damage from Magnilde, Draugr do 1 damage to the other engaged Earth horde, and Kruufnir only manages to get his Earth regiment up to 4 damage. The heartbreaker tho is Craggoth snake eyesing on 22 damage 🫂 Devastated but at what cost?
Free Dwarfs 4: Time to capitalize on Mike’s misfortune! The sword Beast Lord flanks the Fallen horde as fast as possible, with the mangled husk of Craggoth counter-charging the Night Raiders to his rear. Kruufnir is flanked by an Earth Elemental horde, as the Draugr receive another round of pounding from their Earth Elemental opponents. The sharp Earth Elementals counter the Tribesfolk regiment, the Earth Elemental reg that was trying to catch Magnidle charge into her this turn, and the central Greater Earth thunders into the Mounted Sons that killed its fellow, with the orb Beast Lord lending (hindered) support.
The Tribesfolk, Fallen and one unit of Draugr are brutalized and sent fleeing, but it’s not all roses for the Freeforged. The Mounted Sons waver on 12 damage (that’s me failing to roll a 4 with no reroll!), Kruufnir only takes 5 damage, Magnidle takes none, and Craggoth likewise can’t strip the thunderous from his Night Raiders.
Varangur 4: The Tribesfolk horde vaults the hedge and flanks the surviving Greater Earth (hindered but bane chanted), as the Mounted Sons disengage. Kruufnir has another go at the Earth reg’s flank, Magnilde goes back into the Stone Priest, and the Night Raiders envelope Craggoth and prepare to end the scorpion at last.
The Magus thankfully only manages to curse 2 more damage into the orb Beast Lord, putting him on a manageable 8. In combat, the Greater Earth is cutting down under weight of the Tribesfolks’ attaks, but Mike realizes he’s butted the Skald right up against the unit, making it impossible to reform to face my sharp Earth Elementals 😐 Moving past this, Magnidle decapitates the Stone Priest and overruns to stand in front of an Earth horde, Craggoth is stabbed into submission by Night Raiders, and Kruufnir faffs against the Earth regiment, bringing them to 9 damage but still no rout.
Free Dwarfs 5: The orb Beast Lord charges the very damaged Mounted Sons (hindered), the sharp Earth Elementals flank the Tribesfolk horde, Magnidle is mobbed by a horde and a regiment of Earth Elementals, Kruufnir is flanked by an Earth Elemental horde on one side and a CS3+TC2 Beast Lord on the other, and the battered Earth reg has one more go at the surviving Draugr.
Rocks fall, everybody dies.
Varangur 5: With very little left, Mike takes what he can but in the end we are playing Dominate … The Skald hides behind a hedge, the Magus cooks the orb Beast Lord up to 11 damage (he holds), and the Night Raiders put 3 damage on the sword Beast Lord (shrug).
Free Dwarfs 6: The orb Beast Lord hits the Skald for 2 damage (hindered), and the Night Raiders die to the sword Beast Lord and an Earth horde.
Varangur 6: The Magus successfully melts the orb Beast Lord using alchemist curse, shortly before the Skald fails to hurt an Earth horde. But of course there’s another turn.
Turn 7: The sword Beast Lord and an Earth horde charge the Skald, caving his skull in. The Magus I think tried to curse off the 9 damage Earth regiment, which regardless of the result, this was another heavy …
FREEFORGED VICTORY
What a smasher to end the tournament on. Before we started, Mike commented that he rolled three snake eyes in the game before … and so naturally he rolled four in this one 😅 Only one was really catastrophic but his dice in general keep getting worse and worse, especially around his alchemist curse – i.e. his strongest counter into my wall of iron that I could never touch. I heartily thanked his dice for the gift. Mike took his drubbing well and I suspect we’ll play again the next time our regions cross.
Despite my truly unexpected five out of five wins, Cuddle Time still ended up 18th out of 24 teams, scoring high in sports and solid in appearance even if our overall battle wasn’t great. Hopefully the rest of the lads had a decent time? I’m still riding pretty high from smashing everybody up, glossing over Game 3’s poor Abyssal Dwarf seal clubbing. I’ll always wonder how much I can write off my wins to choice of scenario? I played Dominate three times and Loot / Plunder for the other two, which seems pretty perfect for me (hell, I chose them!) Being teched into didn’t seem to matter a lot – Alchemist Curse (4) on mobile casters sucked but I pushed through. I think more mobile armies would have been more of a pain for me, at least play-wise, but you really need to be able to lift to take this army out.
Somebody averaged out performance by faction for this event, and well:
🪨🪨🪨
Looking to do some sort of wrap up for my 2023 Herd tournaments, I took way too many photos to not do something with them all. Til then, thanks for reading!
Round 2 saw Cuddle Time up against a three player team whose name I forget! The upshot is that one of our players will be offered up in a random match up against the extra player from another 4v3 match. I end up paired into Mikael’s Empire of Dust (of Team Venereal Taint), but I’m able to choose Plunder, a totally acceptable scenario.
With 4 out of 5 legends supporting a backbone of Enslaved Guardians and a white hot AC (4) caster (that’s 2 of 2 games for those playing at home), I could see Mikael being on the whole ok with my brick of an army. While I was happy to see a single Wyrm, I was also totally unaware of how good the Behemoth is in 3.5E 😛 I’ve no idea when that happened but damn, you go girl. (Long time readers will remember my efforts to make the Ankylodon Battle Platform shine, and we know how 3E has treated that cousin of the Behemoth!)
I scouted Craggoth up and grabbed a 2 point token before also claiming first turn and taking it with glee. (Mikael later checked the rules on Scout and showed me that you specifically can’t pick up tokens, making it the only move that is not a move in the game, including units that turn on the spot as a combat reform. Kooky but them’s the rules. It didn’t particularly affect our game but I appreciate knowing.)
BATTLE
Turn 1: Freeforged trundle forward, with the exception of Craggoth who drags his token backwards behind the woods and some Mastiffs that shoot forward and grab a 1 point token.
The Empire of Dust deploys measuring sticks and advances in a safe and orderly fashion. The Soul Snare drains 4 damage from the token Mastiffs, obnoxiously wavering them, and the sword Beast Lord is hit with scorched earth.
Free Dwarfs 2: Those wavered Mastiffs rotate out of the way, handing their token off to an Earth regiment, while the other Mastiffs hard to the left grab another 1 point token. Out on the right, Craggoth rips into the striding Enslaved Guardians, tossing its 2 pointer to the other Earth regiment. I punch it down in the center as well, sending the sharp Earth horde (bane changed) and the orb Beast Lord into the haste Guardians. The sword Beast Lord (scorched) powers into the lifeleech Guardians to hold them in place as well, and that’s all the Guardian hordes accounted for.
The sharp Earth horde detonates their Enslaved Guardians, backing up to keep Shobik in their front as the orb Beast Lord overruns awkwardly deep into the EOD line. The sword Beast Lord does an unknown amount of damage into the lifeleech Guardians, and Craggoth hammer slams 6 into his horde of can openers.
Empire of Dust 2: The sharp Earth horde cops a front charge from Shobik, a flank from Skeleton Spearmen, and a surge flank from the Wyrm. The beleaguered central Mastiffs are charged by the Behemoth, the right Greater Earth takes the Rev Cav troop to the front, and Craggoth is hit in the front by his Guardians and the flank by the other Skeleton Spearmen. Oh, and the sword Beast Lord is countered by the lifeleech Guardians.
The Mastiffs sneaking off with a token on the left are Soul Snared for 3 damage, the orb Beast Lord suffers 5 damage from alchemists curse (SIGH), and the Guardians fighting Craggoth are healed down to 3 damage and will lifeleech in a moment after the khopeshs begin to fall. Speaking of, the sharp Guardians are beaten into scrap and the Behemoth flattens its Mastiffs. In happier news, the sword Beast Lord takes 8(!) damage but only wavers, Craggoth goes up to 6 damage and doesn’t care, and the Rev Cav do nothing to their GEE.
Free Dwarfs 3: The grind is well and truly met this turn as charges erupt across the field. The left Greater Earth surge charges the Behemoth (with bane chant for CS4), the Wyrm is flanked by an Earth regiment and fronted by an Earth horde (who scoop up a 2 point token in the process), the lifeleech Guardians are comboed by the sword Beast Lord (who passes headstrong! (on my first time rolling it)) and another Earth horde, the other Great Earth counters his Rev Cav troop, Craggoth hits his Guardians again, annnnd the rightmost Earth regiment flanks the Spearmen assailing the big scorpion’s flank. Whew. In non-combat news, the orb Beast Lord turns to glare at the Soul Snare, as the Mastiffs on the left continue dragging their plunder backwards.
I wish I could say combat was decisive, but it really was not. The Behemoth takes only 4 damage from the Greater Earth, the Wyrm surprisingly lives with 8 damage, and both the Guardians to Craggoth’s front (7 damage) and Spearmen (8 damage) cling to unlife. The Rev Cav are turned to dust, however, as are the lifeleech Guardians.
Empire of Dust 3: Brace for the clap-back, dear readers. The Behemoth hits its Greater Earth in the front, with Spearmen into the flank (and off the hill). The Wyrm counters the Earth regiment to its flank, as Shobik saunters into their flank (and off the hill). Craggoth, meanwhile, takes a second round of Enslaved Guardian to the front and Spearmen to the flank.
In shooting, the Soul Snare snaps the Mastiffs up to 5 damage, wavering them, and while the orb Beast Lord escaped the alchemist curse this turn, the sword Beast Lord did not. He’s baked up to 11 damage but holds! Also the last of the damn Guardians are healed down to 2 (and thus 1) damage. In combat, Craggoth is shoved to 13 damage but triumphantly holds as Mikael’s dice betray him. The Behemoth’s Greater Earth Elemental likewise holds on 8 damage, however the Earth regiment in the center is handily flattened by Shobik and pet (handing their token to Shobik in the process).
Free Dwarfs 4: Having survived the grind, the Freeforged oblige the Empire and drop another round of hammers into them. The orb Beast Lord charges and shatters the Soul Snare, the slayer Beast Lord rears the Spearmen fighting the left Greater Earth and one-rounds them, and the Earth horde who fought the Wyrm before grimly finishes the job. Shobik fairs better, absorbing the charge of a bane chanted Earth horde, and the Behemoth continues to prove hard as nails, surviving another assault from a Greater Earth Elemental. Off on the right, the other Greater Earth arrives in the flank of Craggoth’s Guardians, pulverizing them, as Craggoth and the Earth regiment take care of the Skeleton Spearmen.
Empire of Dust 4: Shobik drops his plunder to juke the Earth horde he’s fighting by surging into a different Earth horde (off the hill no less). He delivers them 6 damage. The Behemoth smacks its Greater Earth up to 12 damage but the big guy continues to hold. And the Cursed Priest turns the sword Beast Lord to slag with alchemists curse 😥
Free Dwarfs 5: The Greater Earth Elemental fighting the Behemoth finally gets some help, in the form of a bane-chanted Earth horde thundering off the hill into its flank. The monstrosity is finally ground back into the sands. Shobik is reared by the orb Beast Lord, effectively crushing the old god against the anvil of another Earth horde, routing it. And the Monolith is hit by both a Greater Earth and a smoldering Craggoth, which level it quite effectively.
Empire of Dust 5: While he can’t win the game with just a Cursed Priest and Sebekh-Rai (cowering behind that ruined building and effectively dead to both of us), Mikael can at least kill my large metal children. Alchemist curse puts Craggoth into the dirt, making me sad.
Turn 6: I have little chance of catching that stupid Cursed Priest, but I can hold all the tokens in my grubby metal hands and try to prepare some emergency token grabbing in Turn 7. Mikael flubs his final alchemist curse in Turn 6, and with no Turn 7, that’s a …
FREEFORGED VICTORY
Wowzers. I did not expect to smash EOD so hard, but a combination of getting a jump on his army and receiving 2-3 really clutch low Nv rolls from Mikael’s dice cinched the game. Alchemist curse was definitely brutal this game but, as with the last match, I felt like there was little I could do about it, so just punched harder where I could. Seems legit.
Round 3 put Cuddle Time up against Best MM, a bunch of total gents also circling the bottom tables. Their captain put me up against Justin, a new player with a WIP 10mm (or smaller?) Abyssal Dwarfs army based up for 28mm Kings. We played Dominate as is my want.
It’s been a long time since I’ve faced Abyssal Dwarfs and longer still for triple artillery, and while AD aren’t all that scary anything can happen when it comes to artillery spikes! Apart from that he’s mostly very slow, but very tough and kind of wants the same thing as me. Also Justin has a dragon, even if he foolishly left the AC (4) mage at home 🫠
Craggoth punches up a flank per usual and I go first also per usual. The new usual.
BATTLE
Turn 1: Freeforged, roll out! Craggoth fireballs 1 damage into the right Blacksouls horde and I surge an Earth horde an extra 1-2.”
Our twisted cousins advance apace, with Lesser Obsidian Golems enjoying some surge boosts of their own. The first artillery volley targets a central Earth Elemental horde but only 2 damage is caused.
Free Dwarfs 2: The iron line shuffles along for the most part, although the orb Beast Lord joins Craggoth in a combo-charge on the right Blacksouls. They hold comfortably on 9 damage.
Abyssal Dwarfs 2: The Golems continue leading the AD advance, moving into Charnox range. Combined with the artillery barrage, 1-2 damage is dealt across the Freeforged line to no real effect. Shortly afterwards, the Blacksouls counter-charge on the orb Beast Lord does 4 damage. Not bad, stunities, but not enough. (Those central Golems may or may not have been able to flank surge the orb Lord, it looks like a hard cut and a fairly long charge to make it in. But I can’t recall if I couched him either way at the time.)
Free Dwarfs 3: I pile into his Golems, with the left one copping a front from sword Beast Lord and Greater Earth, and a flank from the sharp Earth horde; and the right one assailed by an Earth horde (bane chanted) and regiment in the front and a Greater Earth in the flank (off a hill no less). Both LOG hordes bite it. The left Blacksouls, meanwhile, are blocked by an Earth regiment (taking 2 damage in the process) and the right Blacksouls are driven off by the orb Beast Lord and Craggoth. I send the scorpion skittering towards the artillery in the backfield. Finally, the red Immortal Guard regiment takes a preposterous 9 damage from one very lucky horde of Earth Elementals.
Abyssal Dwarfs 3: Those Immortal Guard regen 1 damage (😬) and do 3 damage back to their Earth Elemental assailants. The surviving Blacksouls horde dismantle the Earth regiment fighting them, and artillery and/or fireballs push the other central Earth horde to 4 damage.
Notice that big white base behind the wall in his deployment zone? That’s the Overlord on Ancient Winged Halfbreed, just chilling. I confirmed a few times that he was not being forgotten, but content to make me nervous. The Infernox is behind the central building, looking to the left.
Free Dwarfs 4: Driven by an endless desire for murder, my robot dudes storm on. On the left, a Greater Earth Elemental and the sharp Earth horde blend the Blacksouls horde, as the sword Beast Lord bops just 2 damage into the Ironcaster babysitting them. Centrally, the red Immortal Guard are splattered by a Greater Earth in the flank and Earth horde (bane chanted) in the front, with the orb Beast Lord similarly slapping 3 damage into an Ironcaster. Then Craggoth eats his first Mortar.
Abyssal Dwarfs 4: The Overmaster descends! He swoops into the left Greater Earth’s front, and shockingly one-rounds the De 6+ titan with the help of the Infernox in the flank. Damn, Justin! The other Greater Earth cops some artillery damage (3 total), shortly before the surviving Immortal Guard push the central Earth horde up to 6 damage.
Free Dwarfs 5: Retaliation is, of course, swift. The sharp Earth horde hits the Infernox in the front (I explained the weirdness of facing a square to Justin when reforming after killing the GEE), but do only 4 damage despite bane chant. The same can’t be said of the Immortal Guard, who are given the same treatment as the previous batch, GEE in the flank and all. Craggoth eats his second Mortar.
Abyssal Dwarfs 5: Having appeared, the Overmaster swiftly flits off to the safety of the enemy deployment zone 😀 Leaving the Infernox to punch 2 damage into the sharp Earth Elementals. I wish I could say that Justin’s final mortar shot was impactful but I think it missed or failed to wound like most of the previous volleys.
Free Dwarfs 6: Infernox dies to a Beast Lord with CS3+TC2 in the rear. Poor guy. Craggoth eats his third and final Mortar, settling down to digest.
Abyssal Dwarfs 6: The Overmaster flaps into the Dominate zone, ensuring that he’s got at least 1 US to his name 👍
Turn 7: Buuuuut then I surge and bane chant an Earth horde into the Overmaster, which yields just 7 damage. The Overmaster returns the favor in Justin’s turn, routing the already damaged horde and closing the points gap just a bit more. All the same, this is a convincing …
FREEFORGED VICTORY
I think this was Justin’s 4th or 5th game of Kings? He took his lumps like an absolute prince, here’s hoping he had some fun throughout the tournament and maybe even a win or two. (I asked Best MM’s captain why he paired Justin into me, rather than taking me himself, and he told me it was because he knew Justin would have a good game. I really appreciate that and hope it was true, as this looks like a real stomp writing it up!)
And a merry Fall to you as well, gentle readers! With a lull at work I’m finally getting around to reporting some battles again, and rather than wade into a year of Herd tournaments, I figured I’d punch out my annual coverage of the Crossroads GT. In its current format, Crossroads is a 2300 point two day tournament using teams of four players, taking place late September in Elmira, NY. There’s some jiggery-pokery involved in determining match-ups, but my goal as captain of Team Cuddle Time has always been to give most of my players the least painful games possible. Not necessarily best, mind 😅
I tend to do quite well at Crossroads (probably because I have some control over what scenarios I play), however personal records are a moot point when the rest of your team is getting slagged. Spoilers for this year: Cuddle Time did just about the same as it always does, although our painting and sports scores keep climbing, even if our round results aren’t. Good on ya, lads.
This Crossroads also saw me premiere a new army, which seems to be a tradition for me as well. Printed last winter and painted mostly in the summer, I present my FREEFORGED:
Free Dwarfs Earth Elemental Horde – Brew of Sharpness Earth Elemental Horde Earth Elemental Horde Earth Elemental Regiment Earth Elemental Regiment Mastiff Hunting Pack Regiment Mastiff Hunting Pack Regiment Greater Earth Elemental – Craggoth & Kholearm, Fireball (10) Greater Earth Elemental Greater Earth Elemental Dwarf Lord on Large Beast – Blade of the Beast Slayer Dwarf Lord on Large Beast – Orb of Towering Presence Free Dwarf Stone Priest – Surge (8), Bane Chant (2) 2300 (13/21)
The main goal was to 3D print an entire army, for which I chose a single set of not-Warforged by Artisan Guild, one of my favorite sculpting houses but one that historically does not print well for me. Originally I was going to stay the course and use a third large robot lad, but ended up using a converted automaton scorpion from Cast N Play for Craggoth, partially for my own sanity and also to stand out. It’s an understatement to say I’m happy with the big critter.
As for the list, I feel like I’m back in the 2E days of Bloodfire, strapped for unlocks and starving for unit strength 🙃 But I also wanted to run some De 6+ skew, in response to the high speed hammers + low pierce shooting that’s flooding the meta, and I’d say that was a success. I sacrificed the Mastiff’s throwing dogs to juice up the DLOLBs, which I knew from facing Dwarfs need some items to really tune up, and splurged on +1 to hit for a horde rather than Martyr’s Prayer on the Stone Priest. As punishing as that would have been with such high defense, I really wanted a horde that could do something.
I finished basing the army two nights before the tournament, so like with my crabs I would be enjoying a single prep game on the Friday before the event. Clubmate Bill likewise had a brand new army he didn’t understand either, so off we went …
Game 0: Northern Alliance
I don’t remember what’s in Bill’s list but it’s a decent mix made from the refreshed NA line. The opening gambit of the game saw me scouting Craggoth into charge range of both of his Frostclaw hordes, daring them to have a go. Surprisingly Bill did just that! The birds very nearly broke my new toy, but the scorpion clung to life and Craggoth killed one horde while the other was driven off by a Beast Lord and some amount of Earth Elementals. Side Comment: As much as I love universal pathfinder on my Herd, nigh-universal brutal is great as well. Ogre players know.
Anyway, Bill’s heart left the game once the birds were gone. I weathered his shooting in the middle, including my first taste of frozen vs Sp 5 units, and felt the pain of Hrimm one-shoting a horde of Earth Elementals to the front, but eventually forced a concession about mid-game. I’m not sure how Bill did in the tournament but hopefully his birds served him better!
After this we had some drinks and played obligatory board games into the AM, as is customary for Kings of War events.
Round One sees Cuddle Time up against the Ithaca Lakers! The way pairing works, you end up choosing the match-ups for half of your team and the scenario for the other half. My goal was to always choose scenario if possible, on the assumption that that matters way more for a Sp 5 brickhouse of an army. I successfully got myself Dominate this match, and as a reward I was up against Bryant’s Elves. He’s running a pretty late 2E style list with some decent De 6+ cracking power – for those playing at home, please mark a 1 next to the number of AC (4) casters I’ve faced in this tournament so far 😐
Bryant is a good guy who I’ve faced at other Crossroads. He was running OOGL last year (before they were cool) and you can read about our game somewhere on this blog. A game which he’s still kicking himself for, as he told me. Anyway, I won first turn and took it because Sp 5 brickhouse.
BATTLE
Turn 0: Bryant forms a fast wing and a slow wing while I try not to go pure deathball. Then I scout Craggoth up the flank and he suddenly has a concern.
Turn 1: The Freeforged stumble to war! The left GEE must have been surged a bit for extra distance, and Craggoth misses the leftmost Archmage (I want to say the LB only one) with his fireball / tail laser. Boo.
In response, the Elves back away on the left and move into threatening positions on the right. Classic Elves! The Gladestalkers and that LB Archmage tag a solid 3 damage into Craggoth while the advanced Greater Earth suffers 8, no doubt thanks to the loathsome AC Archmage.
Free Dwarfs 2: I send my big boys in to smash while they still can, with Craggoth slamming 7 damage into the Gladestalkers (wavering them) and the melted Greater into some Forest Guard, turning them into goop. The rest of my turn is spent on the right making sure that the only double charge open to the mead Drakons and Tydarion are some Mastiffs. This takes some time but does successfully lock Bryant into one off charges that I can respond to.
Elves 2: The Forest Guard in the upper left flank Craggoth, pushing him up to 11 damage but the scorpion holds. The same can’t be said for the melted Greater Earth, which is finished off by the AC Archmage in a classic flaming paper vs rock situation. Apart from these big guys being aggressed upon, the bulk of Bryant’s turn is spent deciding where and how to dive into the Freeforged lines. Ultimately he chooses to hit the center of the lines, which I think was as correct as it could be, with no Beast Lords in LOS and asked a little more of my surge than other options. Backing up again might have been better? But it is dominate and I was coming to grips with him slowly but surely.
Tragically both Drakons and Dragonlord stick on their Earth hordes, doing 6 damage each.
Free Dwarfs 3: Instead of finishing off the Gladestalkers, Craggoth counters the Forest Guard in his flank. Only 3 damage dealt but another waver should keep him in the game a bit longer. I send the Mastiffs on the right off the hill and into the flank of the Quicksilver Lancers, for an impressive 5 damage (pretty sure they hindered on that fountain). The Drakons are obliterated thanks to a bane chanted surge flank off a hill from the sharpness Earth horde, while Tydarion only takes 5 damage from his own Earth horde. Finally, I spend some time preparing a landing spot for the helm Drakons coming in from the right flank. There only charge is into a Greater Earth, with a slide that will hinder them on terrain. I’ll take it.
Elves 3: Craggoth is flanked by Gladestalkers and I pay for my hubris as they finally pull the machine down. Elf violence continues as the Palace Guard horde scatters a Mastiff pack and the AC Archmage dunks 6 damage onto the sharp Earth Elementals. The Quicksilver Lancers see their own Mastiffs off as Tydarion wallops his Earth horde to 13 damage, then flubs the Nv test. The play of the turn, however, is Bryant using the Silverbreeze to keep the Drakons from hindering on the terrain when they charged my last Greater Earth. My 5 damage calculation becomes 9, which Bryant spikes extra hard to one round the large lad. I am gently shook.
Free Dwarfs 4: The sharpness Earth Elementals and orb Beast Lord pound into the Palace Guard, delivering a ferocious 17 damage but only wavering the elite horde. The blade Beast Lord slams into the Drakon horde and is forced to go it alone when an Earth regiment falls 1″ short on their surge. The Lord still hammers 6 damage into the small dragons but that’ll have to do. Also Tydarion Dragonlord is flanked and fronted by Earth Elementals, ripped from his saddle and reduced to a red smear. RIP to that guy.
Elves 4: The Quicksilver Lancers plow into the sharp Earth Elementals’ flank, routing them handily. Elsewhere, the Earth Elemental reg that has been struggling up the left flank takes 2 damage from the Gladestalkers and their Archmage, shortly before the Drakons gnaw 2 damage onto the blade Beast Lord.
Free Dwarfs 5: The orb Beast Lord charges the mangled Palace Guard, finishing them off, as the (bane chanted) Earth horde next to him pushes the Quicksilver Lancers up to 9 damage but can’t seal the deal. Plucky Earth regiments make contact this turn, with the left regiment slapping a couple damage onto the Gladestalkers (wavered again!) and the right one helping the blade Beast Lord end the Drakon menace.
Elves 5: The Quicksilver Lancers disengage from the central Earth horde, letting the Archmages work their cruel magicks. Thankfully they hold on 10 damage. The Silverbreeze, however, slip a damage into the 13 damage horde and pop them! Otherwise the Forest Guard start heading towards the center because we are playing Dominate, after all.
Turn 6: The Gladestalkers are driven back to the glades by a very determined regiment of Earth Elementals, as the Quicksilver Lancers are flanked and wrecked by the orb Beast Lord. I make sure all 8 of my available unit strength is in the center and see what Bryant can do.
The Elves drop the last Earth horde and toss a few shots at the orb Beast Lord for just a single damage. With 2 US to my 5 US, this is a solid …
FREEFORGED VICTORY
Awesome first game against a friendly face, that I’m genuinely surprised went my way. I’d say Craggoth was the big standout for me, despite not killing anything at all. I knew he could be a pressure piece but wow what a distraction and a half. Also, I didn’t really consider how much Alchemist Curse and CS/TC 3+ in the game these days when I decided to run a De 6+ skew list, but as we’ll see my lessons were just beginning …
Pilgrimage reports are coming, I promise 😅 In the meantime, here’s another practice game double-header to tide you over. While I couldn’t make the Unplugged GT this year, I was happy to oblige my clubmates with some smashy practice. This was all the excuse I needed to bust out the Bloodfire redux I’ve been poking at …
GAME 47: RATKIN
SALAMANDERS 1995 Fire Elementals Horde Fire Elementals Horde Fire Elementals Horde Fire Elementals Regiment Fire Elementals Regiment Ember Sprites Regiment Ember Sprites Regiment Ember Sprites Regiment Ghekkotah Slasher – tox bolts Ghekkotah Slasher – tox bolts Mage Priest – Crown of the Wizard King; Surge (8), Host Shadowbeast (3) Clan Lord on Raptor Clan Lord on Raptor
The recent buffs to the Slasher have me very excited, especially since I was already going to include them before they got US2 😉 Tox bolts is a ridiculous upgrade solidly in my wheelhouse, and you’ve already seen me messing with host firebeast and Raptor Lords. My list building habits have changed a bit since I started Bloodfire in 2E, along with the meta I reckon, as thick chaff have become a popular and rewarding way to play the game. This first game sees me trying out 2x Fire regiments for the first time. Minor spoilers, I wasn’t quite sure what to do with them! Woefully slow, not particularly tough, and not particularly fighty unless they can grab a flank. But five regiments to get in the way and/or play scenario is a better feel than yet another fire horde.
RATKIN 1995 Shock Troops Horde – Plague Pots, Heavy Halberds Shock Troops Horde – Plague Pots Nightmares Horde Warriors Horde Tunnel Runners Regiment – Brew of Sharpness Clawshots Troop Clawshots Troop Vermintide Regiment Mutant Rat-Fiend The Tangle [1] – Bane Chant (1+), Fireball (10+), Mind Fog (1+), Weakness (1+) Brood Mother – Blight Staff, Drain Life (5) War Chief – Aura (Vicious (Melee) – Infantry Only)
I’m not 100% that Cory had sharpness on the Tunnel Runners but that’s how I’d run them and the points work out. He may have had Strider Boots and 20 points of something on the heroes. Regardless, Cory took rats to Unplugged and had been grinding through different iterations of the list. This is actually not what he ended up taking – he went with the more typical Scud and Cryza and double Nightmares and less infantry overall, as he was struggling to get all the infantry hordes to be relevant. Spoilers again.
We rolled up Salt the Earth, which was good practice as Bloodfire isn’t good at Pillage games and I’m personally bad at burning tokens. Rats go first because Clawshots?
BATTLE
Battlelines! Ratkin Warriors are the horde to the left (with the stalagmites) and the Shock Troops on the right have phalanx. I scout up my Ember Sprites, staying within inspiring range.
Turn 1: The rats skitter forward, with Clawshots punching 3 damage into the right Slasher. The wall of sentient flame oozes closer in response, before Ember Sprites singe the Vermintide for 2 damage. Then I hot hand tox bolts on 6+ to hit into some Clawshots, removing one unit 😉
Turn 2: Ratkin wrap the left flank in, sending the Vermintide into Ember Sprites to be annoying before they burn to death. They do 4 damage to their fellow swarm. The surviving Clawshots punch another damage into the looming right Slasher, and Nightmares blast off the leftmost Ember Sprites.
In response, a Fire Elemental regiment flanks and immolates the Vermintide (surge may have been involved), but not until another round of 6+ to hit tox bolts slams the other Clawshots for 5 damage, wavering them 😀 I am loving these things, but Cory doesn’t necessarily share my joy.
Turn 3: The ratty center backs up as the flank swings in further, with the Warrior horde nuzzling up against a wall. Nightmares shoot 3 damage into the left Fire Elemental reg.
With rats still in charge range, I figured now is as good a time as ever to get stuck in. I triple charge the right Shock Troops horde with a Fire horde, a Fire reg and Ember Sprites, and use surge to block up the other Shock Troops with the remaining Ember Sprites (who also burn 3 damage into the horde before being magically scooted forward). The triple charge results in a decent 12 damage. I also send the left Fire reg into the Nightmares for some amount of damage (and a disorder), with a Raptor Lord into their Brood Mom for 2 damage (and a disorder).
Turn 4: Ratty retaliation is swift and deadly. The Warrior horde (hindered) flanks the Raptor Lord, driving him off despite 6+ to hit (Brood Mom only helped so much), shortly before the Nightmares clubbed the Fire Elemental reg to goo. On the hill, the unengaged Shock Troops splattered some Ember Sprites with the War Chief’s help, and the right Shock Troops chunk 10 damage into the Fire horde thanks to bane chant from the Tangle. Finally, the Tunnel Runners toe onto the lower left hill, although I’m not certain their leader point was on or not? Also the Clawshots tag another 2 damage on the right Slasher (6 total).
Bloodfire, smash! The mangled Fire horde finishes off the heavily damaged Shock Troop horde, turning to face the other Shock Troops as the Fire reg blocks the Mutant Rat-Fiend. Meanwhile a fresh Fire horde plows into those Shock Troops, punching them to 11 damage with the help of some friendly Ember Sprites and scoring a waver! Which won’t mean much because Tangle but still! The third Fire horde slams into the Nightmares but only manages a statistically expected 7 damage. Last but not least, the tox bolt party kicks up again as one Slasher tags 1 damage into the Tunnel Runners and the other blasts the second Clawshots troop off the table. Nice.
Ratkin 5: We are well and truly in it now! The Nightmares counter their Fire horde while that damn Warrior horde (hindered) flanks in for great victory, exploding the elementals despite the odds. The Shock Troop horde counter-charges its Fire horde thanks to the Tangle’s fury aura, and delivers 8 damage (bane chant might have failed?) You’ll notice that the Shock Troops didn’t center up – the War Chief waited for the horde to engage, before shooting off into the damaged right Fire horde and dunking it himself. The MRF, meanwhile, smashed into the blocking Fire reg and did a shocking 2 damage total, shortly after the Brood Mom on the left drained the last of the Ember Sprites off the table and healed the Shock Troops to 7 damage. The Tunnel Runners continue to loom.
Salamanders 5: I am feeling decidedly light on the table 😬 On the right, a Slasher flanks the Mutant Rat-Fiend and tears it apart (the War Chief was just out for the reroll) with the help of the Fire reg. The surviving Raptor Lord takes precisely 2 bites out of the War Chief (even with host shadowbeast +4 O_O), before the Fire horde on the hill burns the Shock Troops down. They face the Nightmares, heavily damaged or no. I debate for a long time and end up bombing the other Slasher into the Tunnel Runners. He’s a big punchy boy and if he can hold, he can probably grind the chariots out and score that point. He lands 7 damage out of 10 attaks, which is a brilliant start.
Ratkin 6: As tempting as that Slasher flank is, the Ratkin Warrior horde mobs the Mage-Priest instead, somehow dragging her down (on 5+/5+ from these enslaved kings). This gives the Tunnel Runners a single shot to rout their Slasher, but despite 7 damage they don’t land the 11 to break. The Nightmares and Brood Mum buzz the last Fire horde down, the Tangle fireballs the right Slasher to a waver (7 damage but shattering!), and the War Chief does a stellar 3 damage to the Raptor Lord.
Salamanders 6: In what I’m hoping is the last turn, the left Slasher shatters the Tunnel Runners and turns to face the heroic Warriors and the Raptor Lord eats the Ratkin War Chief. With 2 tokens apiece and no Turn 7, this is a …
DRAW
Part of me loves coming back to the warm red embrace of Bloodfire, and part of me doesn’t. The army’s problems haven’t really gotten better with 3E, although I do have access to some new toys that make life easier thanks to being faster, shootier, and better at hitting 😛
GAME 48: OGRES
I used the same list as above for the next throwdown against Drew’s Gnollgres, except I swapped one Fire Elemental reg out for a Scorchwing reg for science, putting the extra points towards knowledgeable on the Mage-Priest. After this game I swapped the other Fire reg out for Scorch too, the birds are just too useful and Fire regs are just too meh. Of all the elemental regs, they don’t seem to offer much apart from being cheaper than their horde version. Anyway, onward!
OGRES 1995 Siege Breakers Horde – Helm of the Drunken Ram Siege Breakers Horde – Chalice of Wrath Hunters Horde Warrior Chariots Regiment – Boots of Striding Berserker Braves Regiment Berserker Braves Regiment Red Goblin Scouts Troop Red Goblin Scouts Troop Nomagarok [1] – Bane Chant (2+), Heal (4+), Lightning Bolt (4+) Ogre Warlock – Lightning Bolt (3+), Drain Life (5+) Ogre Warlock – Lightning Bolt (3+), Drain Life (5+) Berserker Bully
To sum up, it’s Good Stuff Ogres but without Boomers 😛 No item on the Hunters is surprising but he’s trying to relive the 2E glory of CS2 + TC1 Siege Breakers I guess. For when you really need to one round a fool.
We played Plunder, because it’s great. During the game it looks like they’re pillage markers but I assure you that they’re loot tokens, neither of us wanted to pick them up for speed / surge reasons. The Gnollgres go first because I’m slow and he’s fast.
BATTLE
Scouting Phase! Ember Sprites creep up but stay within inspiring and retaliatory Fire Elemental range. Hunters are hard to the left with the Bully, Braves are stacked in the pond with Siege Breakers to either side.
Turn 1: The Gnollgres thunder forward, sending the Scouts up to be a menace before the Warlock coven unleashes hell into the Ember Sprites. Drew rolls out of his mind with lightning and removes the center Sprites, with 5 damage dealt to the left regiment. And a couple more to my already low confidence in this match up.
Bloodfire oozes forward in the center in response and doesn’t move at all on the left, while mobilizing chaff on the right. A Raptor Lord charges the right Scouts, delivering 3 damage even with +5 Shadowbeast 😐 Ember Sprite and Scorchwing shooting tags 6 damage on one of the Brave regs but their Nv is always higher than I remember and I realize I should probably have assassinated a Warlock. That won’t come back to haunt me. Oh, and tox bolts punch 3 damage into the Chariot reg.
Ogres 2: Scouts charge off the hill into a waiting Slasher as their fellows counter-charge the Raptor Lord on the right. The smoldering Braves charge the central Ember Sprites, and the rest of the Ogre line tiptoes around very slightly. I deploy more coffee.
Braves eat the Ember Sprites and Scouts deal 4 damage to the Slasher and 1 to the Raptor Lord. The Warlock’s lightning storm zaps 3 damage onto the right Fire horde.
Salamanders 2: I feel like forcing Drew’s hand a bit before he can force mine or lightning one of my hammers away, so I shove two Fire hordes (including the damaged one) into the forward Braves. Ember Sprites get in the way to their right – and do a stellar 3 damage to the Warlock I should have shot earlier! – while the right Raptor Lord takes another bite out of the Scouts. Speaking of mounted heroes, the other Raptor Lord rips into the Chariot regiment to keep them occupied as my Fire reg flanks the Scouts harassing the Slasher (who also counter-charges). The other Slasher decides to look forward to keep its options open, including making a dash for the 1 point token in front of it.* However the coolest play of the turn sees the Ht 4 Scorchwings zip into the flank of the fury Siege Breakers. For reasons.
The Red Goblin Scouts die (RIP), as do the Braves. The Siege Breakers take 5 damage from angry birds, and the Chariots go up to 7 damage from the hosted Raptor Lord and waver. Result!
*This was a mistake that I realized after passing the turn. The left Slasher can currently see the Hunters’ flank if they engage the Fire reg, and potentially if they kill them as well … but what if it’s a combo-charge with the Bully right next to them? And what if they overrun?
Ogres 3: The Hunters and Bully immediately combo-charge the Fire reg, knowing they’ll disappear from the left Slasher’s arc and face the titans piecemeal. Speaking of fighting things piecemeal, the fury Siege Breakers charge the undamaged Fire horde in the center, the second Braves charge the damaged Fire horde, and the TC Siege Breakers charge the right Raptor Lord. Warlocks scoot around for spell-slinging purposes.
Noms heals the fury Siege Breakers down to 2 damage (giving them vicious in the process) and various drain lifes or lightnings put 1 damage on the Scorchwings, but Drew hot rolls a waver. In combat, the Fire reg and right Raptor Lord are obliterated, however both Fire hordes are somehow alive on 8 and 5 damage respectively. I may have never survived a Siege Breaker charge before and am ecstatic.
Drew has spent the year racking up well-deserved paint awards!
Salamanders 3: The Raptor Lord re-charges the Chariots while centrally I send the Fire hordes back into their dancing partners. Yes, I should be double-charging the Siege Breakers but we are precisely aligned and identical frontages, so my right horde is actually in the Breakers’ flank, yet cannot contact it apart from the 0mm corner. So counters it is. In the lower left, I take a moment to lament my life choices before having the Slasher fight the Hunters. Ensnare means I’ll do less damage than against the Bully but the flank next turn will be potentially less bad from the Bully and really I’m setting my other Slasher up as best I can next turn. Slasher #2 walks on the hill and prepares to watch his brother die next turn, but does tox bolt the Bully for 3 damage 😀 Meanwhile, the Scorchwings turn to be a real pain in Turn 4 and Ember Sprites continue to be a pain. They squirt a damage onto a Warlock.
In combat, the Braves are nuked and I don’t reform the victorious Fire horde (I should maybe have backed up?), shortly before the fury Siege Breakers are slammed to double digits (12 maybe?) but fail to rout. Butts. Elsewhere, the Hunters take a decent 5 damage from the Slasher, but the real winner here is the Raptor Lord, who dunks the Chariot regiment with the help of host shadowbeast! I really love these plucky lizard dudes riding, um, other less-dudely lizards.
Ogres 4: The slugfest continues unabated. Hunters counter their Slasher with the Bully in the flank. Helm Siege Breakers trip over a wall and into the last of the Ember Sprites. Fury Siege Breakers hit their Fire horde again, with a combination of heal and drain life returning them to 5 damage. Thanks, I hate it. All those drains push the Scorchwings up to 5 damage in the process, but they hold.
A hot, wet squelching sound can be heard as the Gnollgres kill all their targets in combat. The fury Siege Breakers get frankly really lucky on their side step (3″ of 3″ needed), blocking the other forward Fire horde from flanking them.
Salamanders 4: Denied a flank, I take the fury Siege Breakers in the front and the back with Scorchwings! The third Fire horde I’ve had as backup goes into the helm Siege Breakers, sadly hindered. In the lower left, the Slasher charges off the hill into the waiting Hunters, and the triumphant Raptor Lord plows into the Berserker Bully (who’s on 3 damage).
Shockingly, that Raptor Lord eats the Bully’s lunch, with +5 host playing no small part. Shortly after, the Slasher slams the Hunters up to 9 damage, the fury Siege Breakers are finally burnt to cinders, and the helm Siege Breakers take an unknown amount of damage (math says 3 but I think I did better). Also! We can see that the (now central) Fire horde picked up a 2 point token. In fact, they did this back in turn 2 😅
Turn 5: Damn, the Ogres have a lot of tools left … A combination of drains, lightnings and/or heals from the Warlocks sees the Scorchwings dead, the token Fire horde on 9 damage and the helm Siege Breakers certainly on less damage than before. Those Breakers smash 7 damage into their Fire horde (I AM ALIVE WOW) while the Hunters stab 6 into the surviving Slasher.
In return, both Fire hordes crash into the Siege Breakers, turning them into warm liquid goo. The Hunters are likewise dismembered by the Slasher and Raptor Lord combo, with shadowbeast for spice.
Turn 6: Even with just Noms and two Warlocks left, I’m on such high damage and the 2 point tokens are so close together that this isn’t a foregone conclusion. Drew ends up pushing the odds and playing for a win rather than a draw: Noms charges the 9 damage Fire horde with a 2 point token, who bump up to 11 damage from a Warlock’s drain. Sadly Noms doesn’t stick a wound so no test is rolled. At the same time, the other Warlock drains the 7 damage Fire horde up to 9 damage, but flubs the 8 (rerolled) needed to rout.
I immediately grab a 1 pointer with the Slasher and position the Raptor Lord to move block the central 1 pointer, as the 9 damage Fire horde scoops up a 2 pointer. This leaves the 11 damage Fire horde to bop Noms for 3 damage and hold onto their 2 pointer with rapidly dissolving mittens. With no Turn 7, this is a …
BLOODFIRE VICTORY
Wow, what a game! On the whole I feel like I skated by a couple tough spots with the luck of the (read: Drew’s) dice, but it’s a good feel that we were both in it until the end. Overall, I really enjoyed playing Bloodfire again and reviewing these games makes me want to get the 1995 version back on its elemental feet / stumpy bodies. It’s a lot of Mantic resin but I figure that’s a major plus as well.
Thanks for hanging in there readers, hoping to finally clean my Herd tournament reports out sooner than later! I had a heck of a year with the Hallow and have one more GT before I pack them away for a bit. Stay tuned as ever.